https://lizscreativecorner.blogspot.com/http://lizscreativecorner.blogspot.com.au/p/my-canvases-and-altered-art.htmlhttp://lizscreativecorner.blogspot.com.au/p/my-tutorials.htmlhttp://lizscreativecorner.blogspot.com.au/p/challenges_24.html

Pages

My Lovely Friends,

Tuesday 23 April 2019

Thinking of you

Hi guys, I thought I'd show you today a card I've made for my Mums Birthday,
She's 89 years young soon and she loves flowers so I made her this card,

I used the gorgeous papers by Lemoncraft from the Grow Old With me collection, as well as some images I cut out which included the lace look strip and the clocks too,
Any one who knows me knows I love wood effect papers and this is no exception, the soft colours and design are so gorgeous, after distressing the edges with a distress tool I added a little vintage photo distress ink over the top,
I then used a 13 Arts wallpaper stencil with some of my handmade stencil paste to added a little design here and there,
I cut down a doily from my stash next then added the lace effect strip, again I distressed the edges lightly, On one side I glued on a couple of paper straws too,
At the side of these, I used one of the cut out clocks which again I added some distress ink around the edge too, this makes the cut out items have a little definition, I then did the same with the cut out Butterfly,
Below the clock I added a frame made with some Air Dry Clay which I simply coloured with the same colours as the papers and the matching flowers I made, but more on them below,

Peeking out from behind the flowers is some fabulous chip board made by BlooMar Designs, from the floral Elements 001 collection, again I simply added a hint of vintage Photo to it here and there,

Malgorzata has some gorgeous chipboard collections and she lives in the UK too, so the delivery is super and the chipboard is really good quality and will take all sorts of mediums,

I finished off with another piece of the chipboard at the base of my flowers, but this time I coloured the chip board with more distress ink, this gave the allusion of shadow,
Two more fussy cut out clocks where used and anther fussy cut out Butterfly were used as well,

The Dog Rose type flowers where made out of some 0.6 Ecru Foamiran and Lady E Design dies Flower 001,  I simply coloured some of the petals with some gallery Soft pastel in orange, using a slightly damp wet wipe on the Ecru Foamiran this produced a peach type colour,
I added some stamens which came from 14 Craft Bar,
All the flowers were made in the same way, I die cut them out, coloured some of the petals on both sides then scrunched each petal one at a time between my fingers, slightly easing  the middle section of the petal apart, then layered them up with two layers, keeping the coloured petals more together but aligning the layers slightly off on another, when the glue is dry, make a hole in the flower centre and add some stamens of your choice, 

Lady E Design Dies - Flower 001
Ecru Foamiran - Swedish house Crafts
BlooMar chipboards

Challenges
Lemon crafters on face book - Challenge #2 Roses


Happy Crafting!!


Sunday 21 April 2019

Fun In The Sun

Hi guys, I've done a layout!!!
I know, I say what!!!!
It's only the third one I've ever done,  but hey you have to have a go at these things right? lol
And after all I do love a challenge!!!

I got these fabulous papers by Mintay from the Marina collection, I also saw they have a layout challenge going on on Face Book which had to use two or more photo's, so after taking forever to download some pictures off my phone onto my computer, then find the ones I wanted!! here it is!!


I love the textures of these papers, so I cut the middle section of a second paper with the same design as the base one to raise it up, this I then distressed with a distress tool to make it look even more distressed, I added some card board behind from some cut down packaging to give the depth, 


After adding a layer of the red paper which I had also cut and distressed on the edges I began layering the photo's and fussy cut out images from the same collection,

The photo's are of hubby, with our Daughter and granddaughter while on hols a few years ago,

Like I said I don't tend to do many layouts so I just played around with the elements till I liked the look, then adhered in place,


I built up my photos and some of the cut outs with some foam pads, using one layer on some and two layers on one or two too, this gave added interest but I didn't need to add much more items then the photo's and papers,

I love the way the elements go fabulously with the background papers,


As you can see the only extra's I used was some string and a piece of film strip,

I love this collection so much I have made a 3D project too which I will be showing you soon, love how that one looks as well, oh and I have a card idea running around my head as well, I can see me buying more!!!

Oh well hope you like it,
Happy Crafting!!!


Tuesday 16 April 2019

Two ways to use Foamiran flowers for displays

Hi guys, I want to show you some Foamiran flowers I have created using 
Lady E design dies 002, you may have previously seen them on a post about Foamiran which Swedish house Crafts posted on the 4th of April,


I used Lilac 0.6 Foamiran for the flowers, using the Foamiran  lilac colour for the centre's and colouring the petals with some soft pastel,

To make these, simply cut a strip of the Foamiran  about 2.5cm wide by 9cm, out of Lilac 0.6 Foamiran, for each flower, then cut down with some scissors along the length about 1.5cm with some scissors, (Fringe type stamen)
 glue one end of the strip to some floral wire then wind round the wire till you've wound round about 5 or six times, cut off the excess length if you have any left then add some glue to the end to finish it off,

Take some petals previously coloured with some sort of medium, I used Soft pastel for mine as I said  but you can use, oil pastels, ink pads etc,

Take one previously coloured petal at a time and scrunch  the tops of the flowers between your fingers for a few seconds,( do this for all the petals),

Using the 2nd from the smallest sized petal for the smaller flower, glue one petal at a time around the fringe type stamen, overlapping the petals slightly, you will use around 4 or 5 petals depending on the size of your centre fringe,
Next glue one layer of petals using the 3rd sized petal from the smallest around the petals you've just glued on, alternating the petals and slightly overlapping as before, around 5 petals, this creates a bud like flower,
I then added a hand cut Calyx using Olive Green Foamiran coloured with a little soft pastel on the ends,


The larger flower is made in the same way, but I used the 3rd sized petals from the smallest for the centre petals and the 4th /largest size for the outer ones, again I added a Calyx on the bottom of the flower,

As you can see on this photo they can be used with the floral wires still attached for a floral display, Use some floral tape around the wires to finish these off,
......................................................................


On the photo above I have simply cut off the floral wires and hot glued them to an altered MDF banner by Laserowe Love,
I painted the MDF banner with some white Gesso, then went over with Finnabair Impasto paints, when dry I used some handmade texture paste and a stencil to add some script, I let this dry then went around the edges with some crackle paste,


 I added a layer of Sisal to the middle of the banner then glued the flowers in place on top, 

To finish this off further I made some leaves from the 002 design dies, using the two sizes from the set out of Olive Green 0.6 Foamiran, I glued two of the larger leaves either end of the banner then used the smaller leaves in the middle,

So as you can these flower dies can be used for different sized flowers, buds and also in a floral display or as an embellishment on a project,

Lilac 0.6  Foamiran
Olive green 0.6 Foamiran
Lady E Design dies 002
Laserowe love Banner 


Happy Crafting!!!


Saturday 13 April 2019

Flower Bloom

Hi guys, I created this flower just because I felt like experimenting!! I used the 
Lady E Design dies Flower 002 using white Silk Foam,

I coloured the petal edges with some Oil Pastel added with a damp wet wipe,
As you can see the flower has 3 centre type flower bulbs, with stamens inside, one of which is made out of the same as the outer petals, simply coloured the same way but this time down the whole of the petal, then there are some stamens intertwined with this petal from 14 CraftBar,
This makes a gorgeous single flower bloom as a statment flower or it could be used in a floral dispaly of course too,

Thanks for looking, if  you leave me a comment that would be awesome!! let me know what you think,


Happy Crafting!!

Saturday 6 April 2019

Mixed Media Tag

Hi all, I said the other day I had made another project using one of the Dusty Attic windows with shutters 3 chipboards, I really love these, I need more, lol

So here it is, a mixed media MDF label/tag


I've seen a couple of challenges which I'm adding this too so that helped choose the colours and theme, but I love the outcome as it's really spring like and I'm loving the layers!!
There's a few close ups of my project,
I first painted my tag with some Lindys sprays in moon shadow mist/ Landlubber Green and Golden Doublooms, then added a few drops of alcohol inks, all these I spread with water,
Next I added some stenciling with some texture paste onto which I added some Lindys Magicals Industrial Chic steampunk sepia mixed in, this I then spread through the 13 Arts Wallpaper stencil,
I die cut some swirls two for each one out of some grey board, which I glued together to build them up, these plus the chipboards and air dry clay embellishment made for a Baroque mould were painted with white Gesso first, 
The Dusty Attic bricks then got a layer of brown acrylic paint over,this I added lighter in some areas to create interest,
The swirls I painted with some Flat Magicals Hawaiian islands more alcohol ink, then the Dusty Attic Elegant frames I painted with some white Gesso mixed with some Flat Magicals Hawaiian islands Mai Tai, again I went over in some areas to give depth,
I also painted a piece of embellishment made with Air dry clay this way, this I glued in place so it would be under the window
Taking a piece of cheesecloth I glued some onto the middle of the tag then I added some spare chipboard behind the large floral image which I had cut out of some Mintay Life Stories paper, on top of this I glued the window with the shutters glued on with hot glue so they stood up, I added a little Sisal behind the shutter on the left hand side,
I also used a air dry clay butterfly and a sticker butterfly which I won in a candy, thank you Lia x
Behind the shutter on the right hand side I used a piece of Mini Trellis, but it's shy and it's hiding!! lol
I added some text here and there with a clear stamp and some distress ink,

Here is the air dry clay embellishment, with the second swirl, I fussy cut and distressed the edges of a hinge from the Mintay Life Stories papers and glued this on the base of my tag,
My handmade Foamiran flowers made with Lady E Design Flower 001 and Hydrangea flower 5 dies finish the window off along with a Finnabair Mechanical flower, I then added a flower stem in similar colours,
To finish my tag off I mixed some Finnabair Art Stones with some 3D paste and a bit of the steampunk Lindy's Magicals, this I placed here and there around the tag, I glued some Finnabair metal stars and some Melange Art Pebbles too,


Challenges
colours, texture,
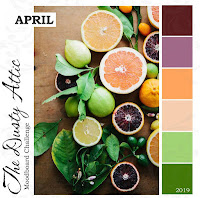
April 2019 Mood Board
colours, home, nature, droplets,
Join The challenge!

Tuesday 2 April 2019

Create memories

Hi guys,  some friends of ours are hopefully moving in the near future, so of course I wanted to make them a card,

I bought this fabulous shuttered window by Dusty Attic a little while ago, I love things like this, in fact I've created a mixed media project with another one which I will show soon, lol

I used some of the fabby papers from Mintay using the Life Stories collection, then fussy cut out some of the flowers and the hinge to create the scene,
I added some stenciling on the background paper first with a 13 Arts wallpaper stencil with some Shimmer graphite paste, after cutting out the hinge and the clock I distressed the edges lightly,
The gorgeous rose was another of the items to cut out from the sheet,
I added some spare chipboard behind the rose to raise it up a little, then added another fussy cut hydrangea style flower as well,
I painted the shutters and window lightly with a thin layer of white Gesso before gluing in place on the cut out large flower display, using hot glue to make the shutters stand forward,

I created some foamiran flowers with Lady E Design dies Hydrangea flower 5 and Tiny Flowers for the Roses to match in with the colours, using Ecru 0.6 Foamiran and colouring them with soft pastels, Ochre andNougat for the rose etc and Cobolt Turquoise for the others,

I again wanted some smaller flowers so I first die cut the flower shapes, coloured them then held them one at a time against a fairly hot iron, this shrinks the flowers, then I built up the rose by cutting one of the flowers after shrinking into two sections, on with three petals the other one left had two, this makes the bud like centre,
Wrap the two petaled one around a thin piece of wire and glue in place,then add the three petaled one around the two petaled one, cut off the wire below the bud,
Glue three layers of the full flower head together, alternating the petals then glue the bud in the middle,


I glued them in place on my card, then added some Lady E Design Tiny Leaves cut out of some more of the papers,
I also added a cut down sheet of the paper on the back too, as our friend loves photography!


Happy Crafting!!