https://lizscreativecorner.blogspot.com/http://lizscreativecorner.blogspot.com.au/p/my-canvases-and-altered-art.htmlhttp://lizscreativecorner.blogspot.com.au/p/my-tutorials.htmlhttp://lizscreativecorner.blogspot.com.au/p/challenges_24.html

Pages

My Lovely Friends,

Sunday 25 June 2017

Cuppa Love

Hi guys, it's my turn again today to show you some inspiration using the latest Craftezee collection for June - Afternoon Tea, this collection is completely sold out but the next one July - Elegance 11 is available to pre-order here now,


In the kit was this fabulous chipboard sentiment, I thought it would go great with some mixed media on and around it so made a Canvas for my kitchen shelf
I took one of the Dutch Doobadoo masks which is on sale now and using some of the fabulous Dutch Doobadoo structure paste with it, going over the whole of the canvas, then carefully lift the mask off,


I then left the canvas to dry, when dry i added some mixed media including some of the Prima colour bloom sprays which Tracy sells too and some waxes from my stash,


I added some  Frantage embossing powder to the chipboard frame and sentiment, heat set it with my heat gun, then finished it off with a cute tea pot charm which was in the kit,

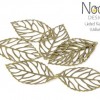
These totally gorgeous stunning flowers were also in the kit and I simply added a metal leaf behind them too,


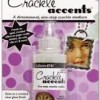
I stamped one of the cup stamps by Magnolia onto Fabriano watercolour paper and painted it with distress ink, when dry I went over the cups with some crackle accents, then fussy cut them out and layered them up ,

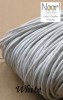
I added a tag onto which I added some text with my computer and a heart embellishment which came in a previous Craftezee collection, I fixed it from the cup and onto the frame by adding some white waxed cord, I used one of the Wycinanka borders which I again gave the Frantage treatment too,

Well I hope this shows you the kits can be used for mixed media projects too,
Happy Crafting!!!


Thursday 22 June 2017

Have A Sunny day

Hi guys, it's time again to show you a little inspiration of one of the latest of Wendy's gorgeous images at All Dressed Up,
I used Flower pots


Now this is really CAS for me, but I thought it suited the image and made her main focal point!!!
I painted her with distress inks and I have given the pots and some of the flowers a layer of glitter, but as usual it's not showing up!! grr


Check out all the latest inspiration from my teamies here and the images are available to buy here,
Don't forget we have monthly challenges on our blog and Facebook too, plus for more inspiration we are also on Pinterest,

Happy Crafting!!

Sunday 18 June 2017

Keep Calm And Drink Tea

Hi guys, this is my second creation with the fabulous Crafteezee Afternoon Tea collection from Tracy
over at Noor Design UK,

This time I used the fabulous Dutch Doobadoo card art Tea Cup which was in the kit, I drew it onto some Pion Design Palette Dusty Rose 11, then used one of the gorgeous papers from the kit too,

After distressing the edges of the designer paper I then layered one of the Wycinanka  chipboard borders near the top edge, I then layered up one of the paper die cuts from the kit, which I coloured up with some distress ink and used some waxed cord as the hanging loop, I did the same for the adorable metal teapot charm too, then I added the metal long spoon charm too, to finish this off I added some tied Vintage seam binding and one of the cute  cupcake brads on the top,
I cut a Fantasy Bazaar doily die in the same Pion Palette Dusty Rose 11 and a couple of the gorgeous flowers from the collection, behind these I added two cut leaves from the Rosy owl Trailing leaves die, I then used one of the teacups cut out of one of the papers and placed it behind a cabochon from my stash,

To finish of my Teacup I added some of the decorative chipboard and some pearls from my stash, then some Dutch Doobadoo structure paste here and there too,


full view again,
I hope I've given you some inspiration today,
The next Craftezee collection is now available to pre-order now
July - Elegance 11Craftezee collection

Happy Crafting!!

Thursday 15 June 2017

Happy Anniversary

Hi guys, it's time again for our challenge over at
As usual it is anything goes as long as you use a All Dressed Up image I've used Kiss For Valentines, as my Sister loves Giraffes so I used it for my Sisters and Brother - in Laws Wedding Anniversary card,

Now as you can see, I think it can be used for any occasion to do with love!!

Isn't it soooo cute!!!
I coloured it with my copics  and I added a tiny hint of glitter on the hearts, though typically you can't see it!! lol

The papers are by Pion Design  where the roses grow, Theodore and Bella and The songbirds secret, from Tracy at Noor Design UK

I also distressed all the paper edges with my distress tool and inked them with Vintage Photo distress ink,
Remember we also have a challenge over on Facebook and some inspiration on Pinterest too,

Happy Crafting!!


Sunday 11 June 2017

Time for Tea

Hi guys, It's my turn to show you some inspiration using the latest Crafteezee collection
Afternoon Tea,
Now unfortunately it's completely sold out but I'm going to show you what is in it , to give you an idea of the goodies which come as part of the kits and for those of you who may have bought the kit I hope to give you some inspiration!! lol

So I couldn't resist using this adorable LDRS stamp Time for a cuppa which I have coloured with my distress inks, soo cute I love it!!


Here you can see I've used one of the fabulous chipboards by Wycinanka Back to Vintage Borders and Decorative, I used one of the borders below the image too, This gorgeous brad is one of a set of  brads in the collection too

On top of the  the chipboard  border I added a gorgeous teacup charm, along with one of the die cuts of a spoon which again are part of the kit,onto which i have added some Stampendous embossing enamel, The beautiful  cream flower is part of the kit and I also made a handmade flower in
 Ivory Foamiran which I coloured in distress ink and added some of the lovely Vintage Matt Latte stamens in the middle, these are out of stock at the moment, but if you e-mail Tracy you can check on stock availability,

On the other side I again used one of the die cuts from the kit of this adorable cupcake, which I simply coloured with distress inks then added a few dots with a pearl pen,

Full view again showing the cute flag strip die cut which again was in the kit,

I used a hint of Dutch Doobadoo structure paste here and there to finish off my card too,

Here's what comes in the collection,
So here again is a gorgeously wrapped package of goodies!!
First peek!! so exciting!!
So two packages of beautiful flowers, 
Gorgeous papers
Such gorgeous designs and colours!!
But guess what!! there double sided too,


So here is the adorable packet of brads, one of which I used on my card above,
Some fabulous Vintage seam binding in white, so love this stuff!!!
One of two gorgeous resin pieces,
The fabulous Wycinanka chipboards borders,
A fabulous chipboard sentiment
Another gorgeous resin embellishment


  Yes there's more!! some fantastic metal charms!!
A fabulous packet of  die cuts,
A packet of Tea, oh the possibilities!! 
Now we haven't quite finished yet!! some beautiful doilies

And last but not least, a Dutch Doobadoo card art Teacup
So I hope this has given you a taster of the awesome products in the kits, the next one will be available to pre-order soon, or the last collection,
Life Is A Journey is still available here
Happy Crafting!!

Tuesday 6 June 2017

"Craft Smorgasbord - masking tutorial"

Hi guys, I'm on the Swedish House Crafts blog today as a Guest designer, I made a card using three of the fabulous From Farm To Market Stamps by Magnolia which are available there to Pre-order, links at bottom of my post,
I  have made a farm scene card with a little step by step tutorial for you,


Masking Tutorial:

I used the fruit Stand, Market Tilda with Fruits and the Tractor stamp to build my scene, stamped with Memento ink in London Fog for the masking and Tuxedo Black for the stamped images, sorry that's not shown,


Take Market Tilda with fruits, stamping her onto your chosen water colour paper with Tuxedo Black Memnto Ink, leaving plenty of space for your other images,


Next stamp the same image onto a post it note or similar using London Fog, anything which is removable can be used, fussy cut this image out, then fix it over the top of the stamped one on your water colour paper,


Next take your Fruit stand and stamp the image in Memento London Fog onto your stamp posistioner making sure you place your stamping block into the top left corner of the stamp posistioner as shown below, 

Remove the stamping block and place the stamp posistioner over the top of your Market Tilda With Fruits with the mask on top, at this stage you can move the stamp posistioner around till you get it where you want it, I placed it slightly off centre so the fruit showed on either side of her and between her boots,
When you like where it is, carefully remove the stamp posistioner block and then ink up your stamp again and place it into the top left hand corner of the stamp posistioner as before,


This is what it looks like with the stamping block removed, it is perfectly normal for bits of the Fruit stand image to show on the masking, you can now remove the mask and keep it for future use if you wish, you may also have noticed some of the stamped images is faint, I simply went over these with a Micron pen which will not run with water colours,


At this stage you can of course leave it as it is, but I wanted to also use the Tractor stamp so I again stamped the Tractor onto the stamp posistioner, using the same method as before,


Then I placed it onto my water colour paper placing it slightly up and to the right to hopefully give the appearance of depth, remove the posistioner as before and stamp the tractor in place,


I then added some drawn lines to appear as a ploughed field,


I then drew a paved path and coloured it with my distress inks,


I wanted my scene to have depth so I added some hand drawn/ coloured flowers and hedgerows,


To finish off my card, I added some stamped fruit in her basket and some flowers from my stash,


Well I hope you like my tutorial and will  maybe have a go yourself,
Remember Have Fun!!
Happy Crafting!!

Challenges:
All about Magnolia - Anything goes
Magnolia-licious - Anything goes with option of masking


Click on links below to pre-order