https://lizscreativecorner.blogspot.com/http://lizscreativecorner.blogspot.com.au/p/my-canvases-and-altered-art.htmlhttp://lizscreativecorner.blogspot.com.au/p/my-tutorials.htmlhttp://lizscreativecorner.blogspot.com.au/p/challenges_24.html

Pages

My Lovely Friends,

Wednesday 27 March 2019

Shabby Chic Birdhouse

I though I'd show you today a LaserOwe Love MDF Bird House I've altered, the Bird House is
from Swedish House Crafts and is just one of a fabulous range of MDF products to alter or decorate and whats more the prices are reasonable  too,


As you know I'm into Mixed Media at the moment so I first painted all the pieces with some Studio white Gesso, when dry I assembled all the pieces together, gluing them with some strong hold acrylic glue, I checked the roof pieces before gluing to make sure they fit in the right way, leave to dry,

While the House dried I took one of the Laser Owe Love Lily of the Valley background chip boards and cut a section of it off, this I then painted with a layer of Gesso, leave this to dry too, 


When dry glue the chipboard to the left hand side bottom corner, glue the heart around the hole which is also Heart shaped, line them up as good as you can, then again leave to dry, when dried take some texture paste, mine was handmade and I simply added some thickly on the top of the heart by dabbing the texture paste and lifting the paste to get the above effect,
I did the same steps with the MDF bird,
 at the same time glue the piece of MDF that the Bird sits on, I used hot Glue to add this,

Next I added some acrylic paint by Dusty Attic here and there on my Bird House, I watered the paint down a little with some water and also sprayed some with a water spray too, do this as many times as you wish to get the effect and depth you want,

I also painted the Bird with this watered down paint, after I added some background colouring with some of the soft pastel,

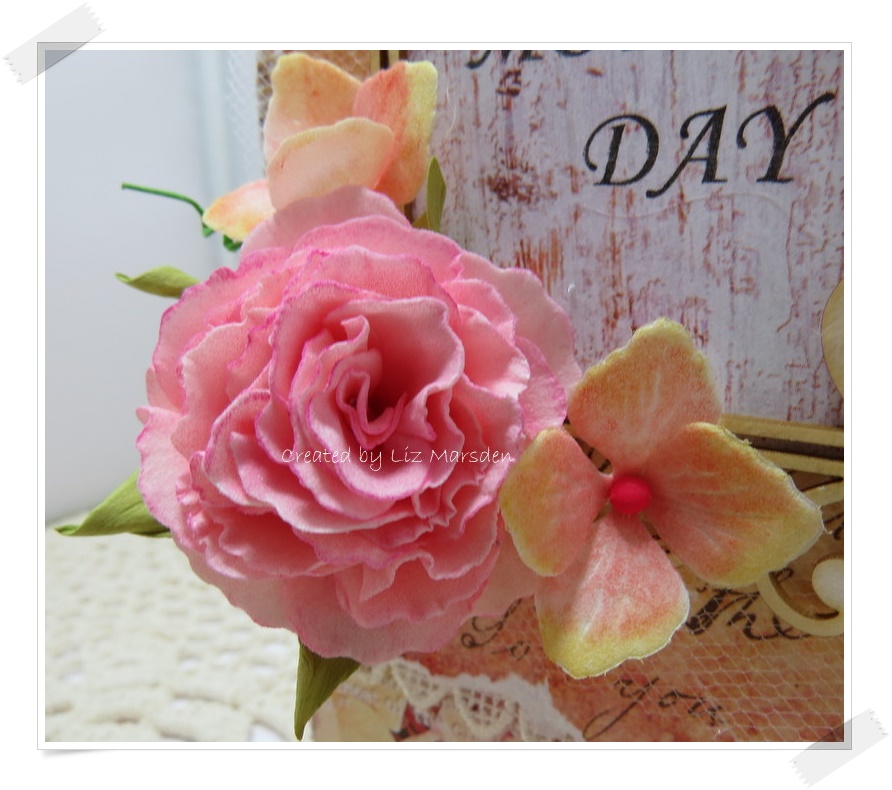
Taking some 0.6 white Foamiran I die cut some Hydrangea flowers out of the Lady E design hydrangea 5 die, these I then coloured with some soft pastels added with a damp wet wipe, don't have your wipe to wet or it will not have depth to the colour,
I glued a stamen in to the centre and shaped the petals towards the stamen with my fingers,


After gluing some Cheesecloth on to part of the roof section I arranged some of my Hydrangea flowers, I then die cut some of the Lady E design leaf die out using 0.6 Olive green Foamiran, I added a hint of soft pastel colour to the edges before gluing in place on the Bird House roof,


For a little added interest I glued one Hydrangea flower on the heart,
Add some cheesecloth up the side of the Bird House to give a little texture, then add some Finnabair Art Stones and mini Art Stones over the top, on the section under the roof I just added the Art Stones onto the MDF with out adding the Cheesecloth first,


Glue a feather onto the ledge then the Bird over the feather, add some more Hydrangea flowers and another leaf under the ledge to finish the Bird House off,


Happy Crafting!!!

Tuesday 26 March 2019

Mothers Day Card

I love the new papers I have got by Lemoncraft from The Grow Old With Me collection,
so I decided to make my Mums Mothers Day Card,

As usual I distressed the paper edges, tearing the middle section too,


I printed a Verse onto one of the papers then placed this behind this adorable chipboard frame 032 by 
BlooMar, behind this is a layer of tulle to add another bit of  interest,

I used some of my handmade Foamiran flowers to finish the card off, the large Rose is made with the 

Lady E Design Flower 001 Die, cut out of Ecru Foamiran and coloured with soft pastels,
 I got the Foamiran from 
Swedish house Crafts who is in the UK and has a fab range of colours as well as some Silk Foam,

 For the Calyx I used the Leaves die 002 cut out of Olive Green Foamiran,
The Hydrangea flowers are again cut out of Ecru Foamiran using the hydrangea 5 die and are coloured also with soft pastels,

BlooMar chipboard

Challenges
Lemoncraft - Vintage Spring 


Happy Crafting!!!

Thursday 21 March 2019

Spring has sprung

I can't wait for the warmer weather to come so I've made a spring themed project just for fun to cheer myself up, lol

I made this Watering can made with a download from  my Silhouette machine,
Using some of the gorgeous Mintay papers from the 12" x 12" Birdsong collection, I loved the way this paper had on the design bits that looked like my watering can had an aged rustic look, to enhance this I left my joins rugged to appear like my watering can is a little antique lol (ie: falling to bits) he he,
I fussy cut some Butterflies here and there from the Birdsong collection,


I die cut some wellies from a piece of Mintay paper from the Lovely Day collection, then layered these up in front of some wooden pieces and a frame I made out of one of two of the images from the Birdsong collection from a 6" x 6" paper pad, I die cut the frame section out and placed it in front of the bird image, then I added a lovely chipboard piece by BlooMar from the flower Elements set 001 on the top edge too, this I cut down and just used parts of it,


I die cut some Hydrangea flowers out of white cardstock then coloured them with a damp wet wipe and Soft pastels, look how fabulous the veins show from the die when coloured this way onto the card stock,

I  die cut the leaves from the leaves 5 die by Lady E Design but this time I used Olive Green Foamiran which can be bought from 
Swedish House Crafts, Suha has other colours available as well,

I used wired stamens for the centers of my Hydrangeas and these I simply stuck into a piece of oasis dry flower foam with a layer of Sisal on the top, 
Full view again,

Have you seen Emilia, Lady E Designs is having a spring flowers themed challenge over on her
 Face Book site,
 why not join in the fun,

Lady E Designs - Dies
Swedish House Crafts

Happy Crafting!!!

Tuesday 19 March 2019

Spring Time

Have you seen the fabulous new products available at
Swedish house Crafts?
There are lots of new items in store including this gorgeous chipboard 3D Hanging Egg,


I love the 3D element of this design, which is easy to make up,


I used some Patina pastes by Finnabair on the surround and egg, using three colours for the surround and base and two colours for the egg, I love the effect this gives, to me it made it a little jewel like, so I added some gems here and there on the egg,


On the bottom base after painting it with the Patina pastes I added some of my handmade flowers, made with 0.6 Foamiran in Lemon using the Lady E designs Leaves 002 dies, I also used the same die for the snowdrop effect flower above using 0.6 white Foamiran with Dark green 0.6 Foamiran for the leaves which I made from the Lady E Design Flower 002 dies,

I have a tutorial for both of these flower types in the tutorials section at the top of my blog,


I then finished off my spring scene with a Magnolia mini world stamp - Wagon with wheels, which I coloured with copics then fussy cut out,


Happy Crafting!!

Wednesday 13 March 2019

Fabulous New Products At Swedish House Crafts

Hi all, well spring and Easter are due soon and guess what?

Suha has some fabulous new MDF products in store for you to decorate with mixed media, papers or what ever you fancy!! so I've made an Easter/ spring based themed project

I've used a MDF large Egg which I have decorated in a mixed media style, then used some of the fantastic new chip boards which are new in store too,


I added some handmade Foamiran flowers and leaves too,
I have made a small tutorial on how I made the flowers and leaves for you
........................................................

Snowdrop type flowers

I made up some snowdrop type flowers out of white 0.6 foamiran and the Lady E Design dies Leaves 002 using the smallest size, for the leaves I used the Flower 002 die die using the smallest leaf die,

Both of these dies are larger then what I finished up with, the way to get them smaller is to pop the cut out flowers one at a time against a fairly hot iron, turn the iron on to the start of the three dots or the cotton setting, place the flower head against the iron with a wooden skewer or something similar as the iron is very hot and you need to hold the flower against it for a few minutes,

Simply hold the skewer against the centre of the flower head then watch the foamiran shrink, keep it held against the iron till you get the size you want, or in this case till it stops shrinking, then carefully lift the skewer away from the iron with the end of the skewer still on the flower head and the flower will curl upwards, let if fall off the iron and shape gently with your fingers,

The leaves are done in a similar way, hold the die cut leaf, (this one has three leaves on the one die) against the hot iron with the skewer, again watch it shrink, when shrunk as much as it will, carefully take away the skewer, the shrunk leaf will fall off the iron or if not remove it very carefully again with the skewer, at this stage you can scrunch the leaves between your fingers if you wish,

Take a piece of floral wire, bend over one end with a pair of pliers or a jewellery  tool, to form a close loop, make a hole in the middle of your shrunken shaped flower and thread the wire through, looped end last, then  glue the flower head to the start of the loop,
Take your shrunken leaves and wrap them around the wire at the bottom so they have the look of mine above, 
..........................................................................

Daffodil Type flowers

Taking the Lady E Design dies leaves 002 and using the middle sized one cut out as many as you wish to use out of lemon 0.6 Foamiran, I kept mine simple but you could use a mould for a little texture,
fold the petals of one flower head together, then scrunch between your fingers for a couple of seconds, this makes the foam a little softer and adds a little shape, do the same steps for the other ones too,

I then cut a strip of the same Lemon foamiran roughly 6mm wide then take a pair of fancy edged scissors and cut along the length one one edge, add a little colour on this edge with any medium you use, I used soft pastel on mine but you could us oil pastels etc too,
Wrap the strip around a large pen or something circular and cut the length off, then glue the ends together, I used super glue for this, be careful of your fingers,
Take the made up circle and glue it onto the cut out flowers again using super glue or similar, let set,
Take some stamens and add these to the middle of the flowers,

Ta Da with a little handmade extras you get a Daffodil type flower out of the same die set as you used for the Snowdrops, 
..........................................................

Now the Egg


I first coated the egg with white Gesso, then when dry I scrunched a piece of tissue paper up, slightly flattened it out and glued it over the  dried Gesso onto the egg, let this dry a little then simply tear off the excess around the edges, making sure the tissue is stuck , press lightly over the top with your fingers if needed,

 I then added the gorgeous chip board background to the top section, this I simply cut down to shape after gluing it on, ( cuts easily with a pair of scissors),I painted mine with Finnabair sparks paints,


I then decided to decorate the base section, which was first painted with white Gesso, I missed out the tissue paper just painting the base with the same sparks paints,


Taking the fence chipboard I added a layer of Gesso but I dabbed it on with a piece of foam, this gives a little texture, the fence had some pots or cups on but I didn't want these on so I simply cut them off before painting it, the cockerel was also attached  but this I left on, 

I then painted these when dry with a few colours of distress inks,
Fix the egg onto the painted base, then add the fence, leave to set,


I Glued some of my Snowdrop type flowers on the other side of the base, then added some feathers from my stash, I also had some mini glittery eggs so I glued this on top of some Sisal to look like eggs on a nest,


I added another Cockerel at the front of the base then added some more flowers and another glittery egg in front of the chip board fence,

Lastly I glued the Daffodils onto the egg on the left hand side to finish it off,

Products used:


Lady E Design dies

I've loved making this project, if you do one too be sure to share it with us, we'd love to see it,

Happy Crafting!!!

Monday 11 March 2019

Happy Birthday Kay

Hi guys, it's my daughters Birthday today, 

As you lovely people who know me from previous posts Kay doesn't do overly fussy or fancy, she's not into girlie stuff like shopping, makeup etc much  either, so I'm always stuck what to make her!!

So I came up with this,

I've recently discovered Mintay papers, I mean yes I know were have I been? anyway I finally bought some and wow how gorgeous is this paper?!!!!
This is from the Dear Diary collection, I mean you've got to get some right?!!

I saw a challenge on the Mintay Face book site to make a Tri - Fold shutter card, well this is the first one I've made, great fun by the way, but it had to have a little of me in it, so the paper edges are distressed, you know me and my distressing, lol

All the images from the paper sheets are fussy cut out, then I distressed the frame effect one too, I layered the other images up with 3D foam pads, the gorgeous flower die in the background I cut out of the paper I made as the base of the card, yes the paper is that sturdy it will hold the design!! good hey?!!

Kay loves reading biographies, so I added some books to the design,
..................................
Some of the sections I left flat with just the inner layer of paper showing, letting the gorgeous background papers show too, I simply added some self adhesive gems here and there on some of these,
.................................................


Well like me she likes a cup of Tea!! 
.......................................

None of my handmade foamiran flowers this time but this gorgeous rose from the paper, again fussy cut out, this means of course that the card folds fairly flat too,

I added a 13 Arts text label on this section too,
.......................................

I stamped the Birthday verse onto a piece off one of the papers, distressed the edges again and stuck it on one of the sections along with a fussy cut out bird, these are lovely,
...............................................

Kay also like candles, hmm a bit girlie!!! and also she loves taking photo's so I added the camera as well,
...................................................

More candle type images and another camera image I placed on it too,
........................................................

Happy Birthday my gorgeous girl, love you!!

Happy Crafting!!
.............................................................

Wednesday 6 March 2019

Altered Box with Peony Styled Silk flowers

Hi guys, I thought I'd show you a box I've had in my stash quite a while and finally decided to use, 
I love it and always kept putting it off as I wanted it to go somewhere I'd see and use it,

Finally I found the place and this is what I created to go with the room it's going in,

I wanted it quite neutral in the colours but with a hint of texture and colour, of course it had to have  some Foamiran flowers too!!

I have some step by step photo's of the box,

After painting the whole box and lid with white gesso  I let it dry, I then swiped randomly over this with some soft pastel on a damp wet wipe this helps lift and spread the colour,


I took a 13 Arts stencil and using some homemade texture paste added a little of the design to one side,


I sprinkled Aged Ivory Frantage over the paste after I'd removed the stencil, tip away the excess then heat set the frantage with a heat gun,


This brought in the hints of the colours too,


I did the same first steps on the box, I later painted the inside too, then when dry added an air dry clay embellishment made with a Prima mould,

On top of this I painted a layer of white gesso then while still wet added some frantage, took away the excess frantage and heat set again with my heat gun,

I made some flowers out of white silk foam with Lady E Design dies flower 002, I then made some hand cut leaves and calyxs with white foamiran in 0.6 colouring these with soft pastels, these I added to my box with some Sisal underneath in a neutral colour,

The edges of the petals are coloured also with some soft pastels and I used matching coloured stamens from 14 Craft Bar,


I also made some buds too,


I finished off my box by adding some liquarel gold coloured watercolour paint  here and there on the box edges to define them a little,


Happy Crafting!!!