https://lizscreativecorner.blogspot.com/http://lizscreativecorner.blogspot.com.au/p/my-canvases-and-altered-art.htmlhttp://lizscreativecorner.blogspot.com.au/p/my-tutorials.htmlhttp://lizscreativecorner.blogspot.com.au/p/challenges_24.html

Pages

My Lovely Friends,

Saturday 30 September 2017

EEEEEKKKKK Sharing my awesome news!!!!

Hi guys, I am finally able to let you know I am part of the Design team for
14 Craft Bar !!! Whoop Whoop
As you know Agnes has the most fantastic Foamiran and stamens available along with lots of other embellishments and papers too, go check out all the gorgeous things Agnes has in her fabulous online shop,
 I hope to be able to give a little inspiration for you soon and do check out what my awesome teamies are making for your inspiration too over at the 14 Craft Bar blog,
why not follow us and come over to see us and maybe say HI,

We are having our first challenge over at the 14 Craft Bar blog on the
14th Of October,
We  hope to see you there,

Happy Crafting!!!

Friday 22 September 2017

Pretty in Blue

Hi guys, you may have seen I was so  lucky to win the Giveaway over at 
In it was some gorgeous Foamiran, as well as other fabulous products too, I have the photo on my win on my sidebar,
I know, how lucky am I, !!!
Anyway I have made a few things with the win but thought Id show you some flowers I made recently with some of the fabulous Foamiran  in colour 016,


I coloured my hand designed petals with a Cobalt blue coloured oil pastel - Gallery 538 and a Gallery Violet oil pastel 520, on the tips of the petals, as usual varying the place I put the colours down, 

I hand designed my petals and drew them onto graph paper then used these as a template,

I also made the centre of my flower with the same foam too,


As you can see by varying the petals it gives a different look to each flower,

I then made a calyx to pop behind each flower head too, using 018 Foamiran again from 14 Craft Bar,


These also have wire stems which I will make into a display soon,

Do check out all the other fabulous products 14 Craft Bar sell, wow !!!!

016
Foamiran 016-MINT

018
Foamiran 018-GRASS GREEN

This is the fabulous prize I won!!!
Fab giveaway - yeah I won

I have done some other projects with my win too, but that's for another day, Lol
Happy Crafting!!

Tuesday 19 September 2017

Country Tilda in her Country Garden

Hi guys, it's my turn today for some more inspiration for 
Swedish House Crafts,
I love the Country Collection by Magnolia, so I have masked the swing Branch, Happy Swing and Country Tilda together, then I also added the cute Little Westie, this comes with a flower stamp too but this time I haven't used it,


So my image is coloured with my distress re-inkers, .....


.... then I cut out my scene with a Gummiapan die from the Old Papers set, 
I used the totally gorgeous papers by Maja Design to match in with the colours on my image, distressing the edges,


I used this fabulous twig with berry die on the front of my image, 


 then in between a couple of my layers I added the same  die which I simply cut up so I could add them on either side of another fabulous die which is a 4 petal flower die, this comes in 5 different sizes, one shown here and  another used here on the branch,


For another bit of added interest I cut out the doodled circle die in white card stock and again placed it between my layers,
To finish off my scene I added the adorable Westie stamp as mentioned above, we have a Westie so I couldn't  resist it!!! as well as being handy for all the  other Westie lovers out there too,


Full view again,

Products used;
Gummiapan - Old papers Die

Challenges
Marvelous Magnolia - Anything Goes
Paradise of Magnolia - Anything Goes
The Ribbon Girl - Anything Goes
Magnolia-licious - Anything Goes

Check out these and all the other gorgeous products over at Swedish House Crafts,
Happy Crafting!!!

Sunday 17 September 2017

Anything Goes at....


Hi guys, it's time for our latest challenge over at
this time it's Anything Goes. easy right!!!
we are kindly being sponsored by 
Wild orchid Crafts, 


I know I've done a Christmas Card again!!! I think I must be Ill, Lol
So the base of the card is a Go Kreate die, I used some fabulous Pion Papers from my stash,
I coloured the lovely Magnolia scene which has been in my stash for years, but is one of favourites with distress re-inkers, adding some liquid applique for the snow effect,


I also added a little glitter on the road as glistening ice,


I couldn't resist adding this adorable piece from one of the Pion papers too,
To finish it off I added a hand made Poinsettia foamiran flower, I made it following a tutorial by Emilia, love it hun!!!
As you can see I added a little of the same glitter to the petals as the road to tie it all in,

I hope you will  join us in the fun,

Challenges
All about Magnolia - All about Anything Goes
Midweek magnolias - Anything Goes
Marvelous Magnolia - Anything goes
The Ribbon Girl - Anything Goes
Paradise of magnolia - Holiday
Happy Crafting!!

Friday 15 September 2017

Another Christmas Card!!

EEEKKK, can you believe it!! I have made another Christmas card and it's not even November!!
I mean WHAT!!!!!!!!!!!!
Quick take my temperature!!! LOL
No honest I saw this adorable image off Wendy


and I just couldn't resist using it for 
our latest Challenge over at the ADU blog which as usual is 
Anything Goes as long as you use a All Dressed Up Image, easy right!!


My penguins are coloured with my copics, for a change!!! I mean WHAT!! I know I must be Ill,they were collecting dust in the back of my cupboard, but shush don't tell anyone!!! he he

I decided they looked like they were having fun in the snow so I fussy cut round  the top sections of the Penquins and made some mock hills as snow slides for them to play on, For the snow effect I used some snowtex here and there and added some trees with a couple of stamps from my stash which went really well with the Penquin images,

For their adorable hat bobbles, and ear muffs I used Liquid Pearl,
I finished off my card by fussy cutting out the sentiment which came with the image,

Why not join us in the fun, Wendy has some adorable images for you to choose from, we also have a Face Book challenge too and if you want some inspiration we are on Pinterest,
Happy Crafting!!

Sunday 10 September 2017

Foamiran Peony style flowers part four

Hi guys, parts 1 through 3 are on my blog previously so scroll down if you wish to see them,
On this the last tutorial for this flower display I am showing you how to make the buds and the calyx's for the base of the flowers


I again will show you one of the buds but the others are again only following the same steps just adding more petals,

Take a piece of kitchen foil roughly 7cm by 7cm square, (the cheaper foil scrunches up better,) scrunch this up into a tear/ bud shape,


When you have the shape you need, make a hole in the wider end with a wooden skewer, shown below


This hole is for a piece of wire, I bent over one end to make the wire a little thicker for the foil to hold on to,

Add some glue into the hole,


Then add the wire holding in place for a few seconds, taking your fingers you can squeeze the foil a little to help close the hole too, 

This is what your after

At this stage your ready to add your petals, so taking the smallest sized petal, start adding them around the foil,

Add some glue to one side of your foil bud,

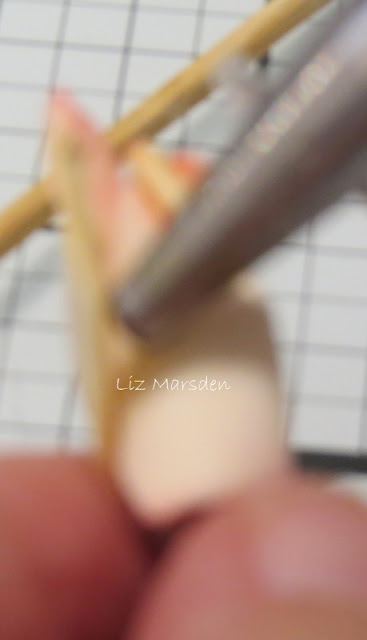
sorry for the blurred pictures, but wrap the petal around the bud,

Add some more glue to the foil and glue the petal to the foil,


Sorry for the blurred photo's my hubby got too close to the work!!!

Anyway hopefully you can see you just keep on wrapping the petals around the foil to cover the foil up, at this stage gluing the petals close to the foil,

When the floil is covered, take the next petals and only glue at the base and half way up the bud, making sure the top of the petal is above the foil too,


Keep doing this with the next petals, nipping the tips of the petal together at the top edge, you can stop at this stage if you wish your bud to have a closed look,

The next row is again glued at the base and half way up but you can leave the tips unglued,
to give a look of the bud opening up,


 For a larger bud, keep going round with more petals, at this stage only gluing near the base,

Keep the base  nipped together,

Keep on going with as many petals for the look you wish,


Again I sometimes use a skewer to shape the petals too, 
when you have added as many petals as you wish it's time to finish off the flowers and buds with some calyx's, to make mine I cut some squares out of Olive green 0.6 foamiran, making the sizes fit in with the size of my finished flowers, to do this measure across the width of your finished flower and cut the square to that size,

Fold one of the square in half,

 Then in half again,


From the folded edge cut some ^^^^^^^^leaf shapes on one side with your scissors, going through all the layers, this is a little hard to explain but if i say the finished shape is similar to a leaf shape going to a point

Turn the foamiran over and do the same on the other side, you are left with this shape effect, 

it does get easier with practice honest!!!
Colour the edges on both sides with a little of the Crimson coloured oil pastel which I used to colour the flower petals,

Place on a medium heat iron for a couple of seconds, 

scrunch up the calyx at this point,

scrunching it between your fingers back and forth like you did with the petals,

This is what they look like at this stage,

slightly uncurl the calyx's then make a hole in the centre and add to the wire with the relevant sized flower or bud

start gluing the calyx to the base of your flower,

you can glue near the wire and slightly up the petal,

Press on it lightly to adhere,

keep going round till all the calyx petals are glued, here I added another calyx too, doing exactly the same steps, you can also at this stage scrunch the tips of the calyx again,

To finish off the flowers and buds I added some floral tape on the wires, and some hand cut leaves too, then glued them into a flower display,

This is the other side,

well I'm sorry for the blurred photo's I will try to sort that out for any in the future, soon I hope, but  I hope you could still make out the directions of what to do anyway,
Thank you all so much for your lovely comments, I will certainly try to show some more soon,
As I said before any questions just ask and please feel free to leave me any comments, I will try my best to get back to you,
Happy Crafting!!