https://lizscreativecorner.blogspot.com/http://lizscreativecorner.blogspot.com.au/p/my-canvases-and-altered-art.htmlhttp://lizscreativecorner.blogspot.com.au/p/my-tutorials.htmlhttp://lizscreativecorner.blogspot.com.au/p/challenges_24.html

Pages

My Lovely Friends,

Tuesday 30 January 2018

A Birthday Card For My Sister

Hi all, I'm here today with a post for
which as you know has some gorgeous products in store including lots of beautifully coloured  Foamiran, stamens and lots of other products to,


I made this card for my sister (who loved it) using lots of the products from 14 Craft Bar which I shall list below,
I made my card in the size 5" x 7" and used the gorgeous papers  from the UHK Gallery Wedding Morning paper pack, I love how these papers can be used for more then Weddings and love how well they distress too,
So next I built up my layers beginning with a doily from my stash, a chipboard piece which I coloured with some distress ink, a bird made out of air dry clay,a little sisal  then of course my handmade Foamiran flowers and leaves,
My roses are all made with Foamiran in 06 weight, this means you can mould and shape the flowers with out the need of an iron,


The middle and top flowers shown above are out of 007 Pale pink Foamiran and I used  the Multi Flower Die using the first three smallest sized dies,


The lower roses I made out of 001 white Foamiran and I coloured them with some soft pastels with a slightly damp wet wipe, these look beautiful in real life as my camera isn't really picking up the hint of delicate pink,
I used 020 Olive Green Foamiran for my hand cut calyx's and leaves, these I coloured with an oil pastel lightly too,

I coloured the Happy Birthday chipboard with distress ink too, then added some sequins here and there to finish my card off,


Check out all the gorgeous products available at the 14 Craftbar shop  or for some inspiration look at the 14 Craftbar blog


Tuesday 16 January 2018

Happy Birthday - Another one for the men in our life

Hi guys, I am here today with another post for Swedish House Crafts DT, with yet another card for one of the men in my family, made using some of the awesome products from 

My sons Birthday is at the beginning of January and of course I struggle to know what to make each year for him and something different, so this is where the fabulous products from
 Swedish House Crafts came in brilliantly!!!


So I used the fabulous Denim and Friends papers by Maja Design, these I cut out using a Gummiapan old paper die, these dies cut so easily and as you can see they  have different sizes so you can layer them up too,


Here I couldn't resist using the fabulous candles set and die, which I simply added some glitter to the flame at the top after colouring in with some of my copics, these look fabulous for feminine cards too, and of course you can just use the die part or the stamps on there own,


How cute is this Happy Birthday gift set stamp? and so useful!!! I stamped it once on the designer paper, then again on some white  card stock in vintage photo distress ink, then cut the Happy section out and layered it over the top of the one stamped on the designer paper, this gives a very easy 3D effect,


I also used the adorable Little cupcake stamp which I coloured again with my copics then fussy cut it out, this also can be used for females just altering the colours and adding more bling perhaps?


This fabulous balloon stamp is another by Gummiapan, which I coloured with my copics then added some of the cute metal sequin stars on the Balloon as well as here and there on the rest of the card too, for the string section I used a  die cut from volume 17 by Magnolia, Suha sells lots of products and kits by Magnolia do check them out!!!


I finished my card off with some larger stars cut with a die cut from the middle of the nesting squares dies by Roxstamps, how good is that??

Pop on over to Swedish House Crafts to see all the fabulous New Products Suha has in her online store too,

Maja Design papers - Denim and Friends - Stonewashed
Maja Design papers - Denim and Friends - Stars and Stripes
Gummiapan die - Old Paper
Roxstamps - Nesting Squares Die
Gummiapan - Balloon stamp
Gummiapan - Candle set and die
Gummiapan - Happy Birthday Gift stamp
Gummiapan - Little Cupcake stamp
Metal sequin stars

Happy Crafting!!


Monday 15 January 2018

It's challenge time at ADU

Hi guys, it's that time of the month for our challenge over at 
I just love this adorable image  Love My Teddy and couldn't resist using it!!


I coloured it with my copics, keeping the colours light, I distressed the edges of my papers and around the image, I also added a little texture paste around the image too, just for a little added interest,


The papers are by Maja Design from my stash as are the flowers, twine, cheesecloth, doily and lace,

Pop on over to ADU to see all the other gorgeous creations from my team mates too,
we also have a challenge running on Facebook and inspiration on Pinterest too,

Happy Crafting!!!

Thursday 11 January 2018

Stunning Carnations in blue with a tutorial

Hi guys, I thought I'd show you today how I made some carnation style flowers out of Foamiran, which is available at 14 Craft Bar,


For my Tutorial I have used some of the fabulous 0.6 Foamiran in 013 Sky Blue  but you could of course use a different colour, and a circle die measuring 7.5cm


I took a circle die I had in my stash and drew around the edge with a skewer, you can use any circle you have in your stash or draw one, Are wondering why didn't I die cut them out?
Well the reason is I then cut round the circles with some pinking style scissors,


Roughly following the drawn line,


When you have cut them out fold them in  roughly in half then in half the other way too,


At the center point where the score lines meet insert your skewer or similar to make a hole, sorry it's not showing very well on my photo


Next cut with some ordinary scissors down one of the fold lines you made previously going from the outer edge to about half a centimeter away from the middle, do this on the remaining fold lines till ...


All four fold lines have been cut,


The next stage is to take your scissors and cut half way in between the sections you've already cut as shown below,

continue going round cutting in between the original cut lines,

till you've done all the four sections,  Don't worry if some of your sections aren't quite equal depending on the size of the circle used, as it doesn't matter for this type of flower as the more random the petals look, the better


Take a couple of of the finished flower heads and cut down the middle to make them into two halves,
four pieces all together, shown below is one I have already scrunched,


So at this stage you can slightly scrunch each petal section between your fingers, to add a little extra detail and shape,


Take one petal at a time and very carefully scrunch the petal back and forth between your fingers for a couple of times, it will look similar to the picture below,

Do each petal in turn the same as before, hold the centre of the flower firmly with your other hand so the petals don't tear, as shown below

You can slightly unfold them at this stage if you wish, but I only did it lightly,

Next add some glue to a piece of wire,

Then take one of the flower heads you just scrunched and glue it on the next to the right hand side petal as shown below

Then while this is still hot fold the first petal one the right over the glue, trying to keep the petal top pointing upwards,


Continue to wrap the rest of the flower petal around the wire in the same way

 till the last one then glue it in place near the base of the petal, press lightly to hold but be careful not to burn your fingers!!!


Take your next flower half and glue it where the last one finished doing the same moves again till all four half flower sections are added,

Tweak any petals with your fingers that need re scrunching or just aligning up, but the look I wanted was for them to be imperfect as sometimes nature is, next take one of the larger full heads which again have been scrunched lightly and place the wire through the centre hole, then glue them in place,
here a couple have been glued in place, the single flower head is waiting to be threaded onto the wire

Continue to build up your other layers as shown staggering the petals as you go,


Here you can see I have used more layers on one then the other as this makes an opening bud styled look flower head too,


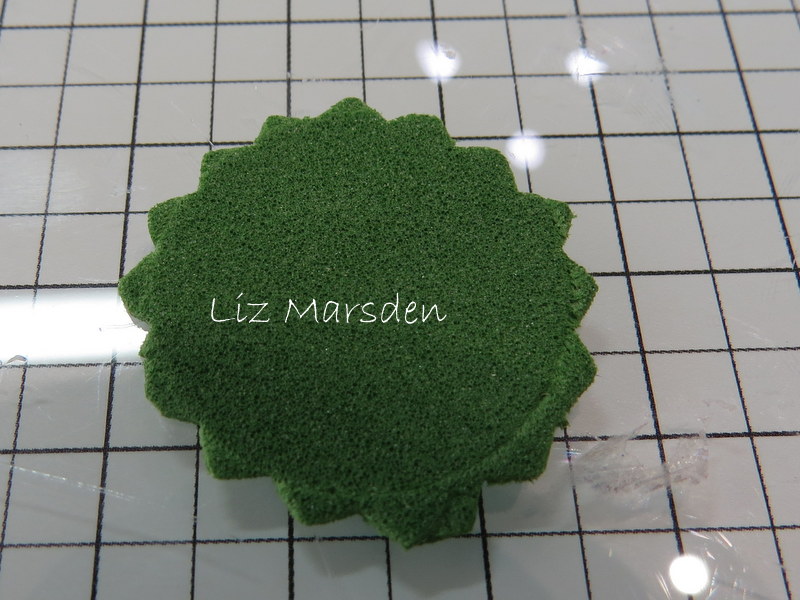
Draw  out a circle out of some green Foamiran and cut the edge the same way as before,


As you can see I slightly went off the line, this won't be a problem to the finish,

Heat this for a couple of seconds on a warm iron , then press the center with your thumbs lightly easing the foam down to get the cup shape, at this stage make a hole in the center and fix to the bottom of your finished flower head, glue in place behind your flower head....
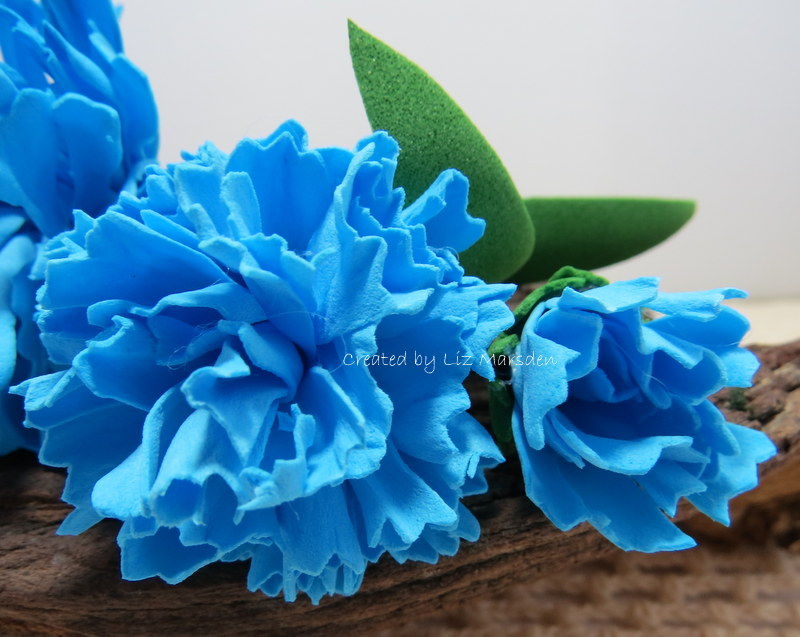
sorry not shown, I then covered my wire with some floral tape and cut a couple of leaf shapes by hand to finish my carnation type flowers off,


As you can see each flower head is unique, which I rather like!!!


Here I've placed them in a jar for in my Kitchen,


Products used:


If you have a go yourself I would love to hear off you and see what you have made, as always any questions just ask!!
Happy Crafting!!!