https://lizscreativecorner.blogspot.com/http://lizscreativecorner.blogspot.com.au/p/my-canvases-and-altered-art.htmlhttp://lizscreativecorner.blogspot.com.au/p/my-tutorials.htmlhttp://lizscreativecorner.blogspot.com.au/p/challenges_24.html

Pages

My Lovely Friends,

Wednesday 30 September 2020

Seasons Greetings

 Hi Guys, I thought I'd show you a couple of cards which I've created for Christmas, I mean what Christmas!! am I ill? as those who know me I don't normally do Christmas cards early!! lol


I used the Amazing paper grace Doily Round dies again, I love how you can use this die so many ways, this time I used it as a base for my shaped cards, so cute!!

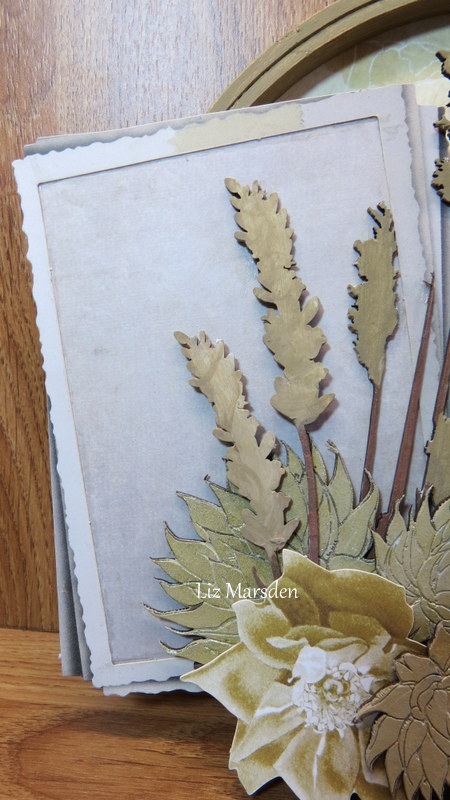
I used the solid section of the die behind out of a Gold coloured pearlized card stock, then die cut the top section in white 360gsm card stock, using some more of the Gold for the centre circle on top,

I made some Poinsettia type flowers using the Cinch and Go Poinsettia dies again from Spellbinders Amazing Paper Grace by Becca Feeken,


These I cut out of watercolour paper, then added a little water and shaped them with a ball tool, when dry I glued two layers together and added some stamens from my stash, I then glittered over the top with a fine glitter,


I finished off the card with a little twine under the flowers and some Gold effect gems, along with a sentiment from my stash which I stamped in a Gold colour onto a tag of Vellum,

...................................................................

I made another card again using the same dies but this time in Blue and white, with silver accents and clear gems,


I also decided to add the Poinsettias made out blue coloured 260gsm card stock this time in the centre,

I took one of the tiny accent dies from the Charming Cottage Box to make the leaf effects out of silver Mirri card,


As I mentioned clear Gems finish the card off,

I love how different they look for mainly the same dies used,

I'll be back soon with my next project which is Autumn themed,!!! 

Happy Crafting!!


Friday 25 September 2020

With love

 Hi guys, the weather is turning cooler here and so to cheer myself up I made a card in lighter colours,


I used a few Amazing Grace dies to create this card, for the base I created this beautiful Doily look with the Doily Round die, I only used half of the die this time,  by simply placing the centre of the die on the edge of my card and running it through my die cutting machine, I then raised this up with 3D pads,

Using some off white 0.6 Foamiran and the Cinch and Go IV dies I created these gorgeous flowers, I used two layers of the same dies alternating the layers, then adding some stamens from my stash for each flower head,


I used the larger ones first, then trailed them going smaller in size down the card,


For underneath the flowers I created a tag using the tag die from the Charming Cottage Box die set, first in card stock then with another layer cut in vellum for over the top,


I finished off the card with some pearls and another of the Amazing Grace die from the Double halo Oval using the small accent die, this I added to the centre of the Doily and on the top edge of the card,


I've made some Christmas cards with the Doily die too, but that's for another day, lol

Happy Crafting!!


Monday 21 September 2020

Happy Birthday

 Hi guys, it's my Brother-in-laws Birthday soon, so of course I have the same problem every year what do you make for a fella especially one you've been making cards for a long while!! lol

This year I've gone for a hint of Autumn in the card,


As you can see I've used the fabulous Amazing grace Grand Christmas Lattice Arch die, I find this die so useful and have used it a few times non yet for Christmas, of course that's to come,

This time I cut it twice out of Kraft card stock layering up the layers with a few 3D pads,


I used some Mintay papers from the Cozy Evenings paper collection behind the totally adorable chipboard Mini owl by Dusty Attic which I got from The Mad Scrapper,

I added some white Gesso onto him then when dry went over with some distress ink, I did the same for the Dusty Attic branch too, I then went over the top of the branch with some more white Gesso spread  Lightly here and there with my finger,

I have this adorable Toadstool die in my stash, which I simply die cut out of watercolour paper then I added some distress ink over the top,


Friday 11 September 2020

Tranquillity

Hi, I'm so happy to be here today with my first post as a design team member for

As you may know Janine has a online shop as well as a bricks and mortar shop too, I love to visit the shop and could spend hours there, lol

Anyway on to my project, I love to use Dusty Attic chipboard to create my projects so of course my first DT project has some on,


I based the project on an online challenge which chose the colours and theme for me this time, it was based on browns, beige's and greys so I went with these,
I had an embroidery hoop from my stash so I started with that and coloured it first with Gesso then with some Finnabair Burlap acrylic paint, I will list all links below,

I took one of the beautiful paper sheets from the 49 and Market Vintage Artistry Butter collection pack for the inside of my hoop, onto this I used the Finnabair Tapestry stencil with some Finnabair Modelling paste, after letting this dry I simply glued the paper behind the hoop,


This fabulous paper frame also came from the gorgeous 49 and Market Vintage Artistry Butter collection pack, thankfully the sheet and frame had beige's on, lol to keep the colour theme in I used a spare piece of paper from another pack in my stash, which I simply glued behind the frame,
This gives a base to build the layers onto as well,


To give some added interest I used one of the D/A Wagon Wheels which I coloured in grey, then I fixed this behind the frame on the right hand side, I raised the height of  this with some small pieces of foam pad to keep in with the layered look,

I took some D/A Driftwood #2 which I coloured first with some Distress ink in Gathered Twigs, then I went over lightly with a thin layer painted randomly over the top with some white Gesso,
I then cut down an old paint brush from my stash to which I painted the Burlap paint on to keep in the colour color theme,

I layered some Dusty Attic succulents along with some Reeds and Lavender, these were coloured with the same Burlap paint but I mixed a little white Gesso with it to give it a paler look, I used some Gathered twigs distress inks on the stems, 
For the succulents I also went over the top with a thin layer of Finnabair sparks paint in Unicorn Hair, 
I placed one of the laser cut flowers from the same paper collection too and a little moss from my stash to finish it off,

Dusty Attic - Succulents #2

Janine has lots more products online and in her shop too,

Challenge
Dusty Attic September Mood board,

Happy Crafting!!
Hugs Liz xx

Friday 4 September 2020

Haunted House Club

Hi Guys, I'm so in the mood for creating Halloween projects, my granddaughter loves it so I make things for her,
this is my latest using some of the awesome dies by Becca Feeken Amazing grace dies by Spellbinders,


I love creating things like this!!! lol


This section of the building is made with the fabulous Charming Cottage Box Die, it comes with some die cuts for Christmas to make a Christmas box but I love how it can be used for other projects too, I also used some of the dies from the Spooky Cottage die set, the window, and the tree,
I added a Tim Holtz skull and a plastic spider and used a web die from my stash, the mini bricks are by Dusty Attic,


I added another of the Spooky set dies for the top of the roof, I made the roof tiles out of black card stock using a Cuttlebug embossing folder I've had for years, lol
The door die cut came from the Spooky Cottage die set as well,


I have a Dutch Doobadoo milk carton stencil in my stash again I've had it years which I used for the middle building, again I used the Spooky Cottage dies by Becca for the roof, windows, door and using the wrought Iron fence die as a balustrade in front of the windows,


I added more tiles on the roof sections and added a die cut bat from the same Spooky Cottage die set,


The base for this section is made using the fantastic Grand Christmas Lattice Arch die, but this time I used it by cutting four of the fronts, then I die cut the 3D Vignette mini albums die to create the edges for joining the fronts together, where you valley fold I cut these lines then mountain folded the middle line, these fit perfectly on the sides to fix them together,

My granddaughter loves the Floss, so I found these flossing skeletons on my Silhouette cameo studio and cut them out, then added them and the tombstone and the bats all with the Silhouette, another plastic spider crawled on too, I added vellum behind the arch for them to fix on,


This is what it looks like at night!!! 


I added a battery tea light inside the box so it gives a eerie glow,


Then inside!!


The mummies are at play, these are made with the Spooky Cottage die set,  such fun!!! lol

Well, I shall be back soon!!
Happy Crafting!!

Wednesday 2 September 2020

New home, new memories

Hi all, I made this a couple of months ago as my Daughter and family were supposedly moving home, well too long of a story to tell it only came about yesterday!!! 


Instead of a new home card I made a mixed media tag, most of the products were of Lisa Horton the  chipboard hinges, keys, stencil, script stamp and 4 point blooms stamps and dies,


I created the tag using their favourite colours,

they had a gorgeous day for moving and it's cooler and pouring down with rain today, so it wouldn't have been as good!!

Happy Crafting!!