https://lizscreativecorner.blogspot.com/http://lizscreativecorner.blogspot.com.au/p/my-canvases-and-altered-art.htmlhttp://lizscreativecorner.blogspot.com.au/p/my-tutorials.htmlhttp://lizscreativecorner.blogspot.com.au/p/challenges_24.html

Pages

My Lovely Friends,

Monday 25 December 2017

Merry Christmas To You

Hi guys, It's my day today to show you a little more inspiration at
I have decorated a Wreath to place in my indoor porch,


I used a bought plain wreath to alter and added some white Gesso to the wreath first, when dry I  placed some sisal at the base then added my handmade flowers,
 all links below,


I used some more of my hand made Mistletoe berries made with air dry clay, I then used Olive Green Foamiran for the hand cut leaves and coloured them with a hint of Oil pastel here and there,

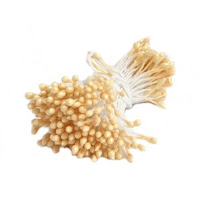
I again made my Poinsettia flowers using the number 6 Stencil layering up 3 layers and some 2mm stamens for the middle,
I then also used some of the fabulous berries Agnes has in store too,


I used 022 Foamiran for the backs of the Poinsettias as you can see,


I then made this flower using the Stencil 05, Red Foamiran and 3mm stamens, again I used the same green Foamiran for the back of the flower,
Here you can also see the Holly Leaves I made out of Olive Green Foamiran which I've given a hint of a pattern to with a skewer by drawing lines along the centre and out to the points, then I added a little colour with the oil pastels,

For the top of my wreath I used some items from my stash


Full view again, As you can hopefully see...

....to finish it off I then added some course glitter on the edges of the petals here and there, to give a hint of an Ice effect,

Products List:


Wishing you a Very Happy Christmas and New year
With lots of good health and happiness,

Happy Crafting!!!


Wishing you A very Merry Christmas....

And a Wonderful crafty New Year!!

Hi guys, over at Swedish House Crafts a few of us girls are showing you some of our recent makes,

I made this one with a lot of the products from the  Volume 17 kit by Magnolia, which of course I got from 
Suha over  at Swedish House Crafts,


I made this for my Daughter and Family as this is how her fireplace always looks with four stockings like this!!! papers are by Maja Design, so love their papers don't you?

I made the bricks on the fire place with the middles of the ladder from the Vol 16 kit by Magnolia, do check all the fabulous crafty products Suha has in her online store

Also pop over to Swedish House Crafts for the latest news and products!!!! plus
Suha has some special offers on, go check them out!!!

Well guys, believe it or not I am back later this morning with my last post for this year, 
Catch up with you soon!!!

Wishing you a fabulous Festive Season,
Happy Crafting!!!


Friday 22 December 2017

Christmas Gift Envelope

Hi guys, I'm here today with one of the latest releases  
from Wendy at
I couldn't resist using this gorgeous image into a gift envelope,


I coloured the image in with my copics and added a hint of gold with a pen, I then used some ribbon and trim from my stash,


I used my handmade Foamiran flower and some pearls to finish off the front,


Inside I used more of the fabulous papers It's Christmas Time by Maja Design which I got from Suha at Swedish House Crafts,

Come and join us in the  blog challenge over at 
All Dressed Up or on the one over at Facebook
............................................................
Foamiran and stamens  available from 14 Craft Bar

Happy Crafting!!

Thursday 21 December 2017

Turkey Anyone?

Hi guys, do you struggle with cards for the men in your life? I have to make a few Mens cards and I always ponder for ages to think of something new they haven't seen before!!!
so I came up with these two just for a bit of FUN!!


I printed off the images and coloured them with my copics, adding a little glitter for the trim on the hats,


I then cut the image out using a fabulous Die cut Nesting Round cross stitched  by Roxstamps from Swedish House Crafts,
I also used the fabulous tree stamp and matching die cut again from Swedish House Crafts as an embellishment, these are great for mens cards and I have used them a few times,
The papers are By Maja Design, the trim is from my stash,
To finish the cards off I added a little computer printed text!!!

Well I must admit it's very strange for me to make more then one card of any style but they were going to two different homes and I kinda liked them!!!! Lol

I'll be back tomorrow for All Dressed Up
Happy Crafting!!

Tuesday 19 December 2017

Merry Christmas

Hi guys, I thought I'd show you today a card I've made for Christmas for my hubby,

I also have a fab treat for you too, you can have a 5% discount on any of the Maja Design - Joyous papers, if you place an order using the code SB58SQL5A64 at Swedish House Crafts
Valid until 31st Dec


I used the fabulous 12 x 12 paper set Joyous Winter Days by Maja Design on my card, these are fabulous with some fantastic colours and patterns which can be used used for more then Christmas creations too, more on that another time, lol

As you can see I used a few of them here layering them up using the really useful stitched banners die by Gummiapan, at one end I also used one of the  metal eyelets in Mixed meadow,


I then used this fantastic tree stamp and  matching die, I fixed one directly to the base of my card and the other one I layered up with some foam pads, they would also make fabulous gift tags too by simply making a hole near the top for some string or twine etc,

I then finished off my card with some of the so cute metal star sequins in gold and silver,


Products used:

Remember if you wish to order any of the Maja Design Joyous papers just use the code 
SB58SQL5A64
 at Swedish House Crafts for a 5% saving on the price,

and if you fancy a little more discount you can see more details on this previous post here too,
https://lizscreativecorner.blogspot.co.uk/2017/12/a-gift-stocking-holder-for-you.html
available up to the end of December

Do check out all the other fabulous products over at Swedish house Crafts too,
Happy Crafting!!


Saturday 16 December 2017

Altered Christmas Lantern with Christmas Rose Tutorial

Hi guys, it's my turn today for some inspiration for
14 Craft Bar
So  I thought I'd show you a Lantern I altered, 
I bought this metal lantern from a local store just crying out to be altered with some Foamiran flowers and foliage, all links below


So I started out by adding some gesso in white painted here and there, then onto the top section I added some cheesecloth and some sisal, on the lower sides I added some tiny foam balls from my stash,


I created all the flowers for the top section using various Foamiran, stamens, leaves and stencils,


I made the Poinsettias out of the fabulous  Red Foamiran using the awesome Stencil 06, I also cut the Holly Leaves out with this stencil too,


As you can see I also made a few Christmas Roses too, these I made using he stencil 01 with white Foamiran,
......................................................................................
Christmas Rose Tutorial:
You will need:
Foamiran of your choice, stamens, mold, stamens, copics or other colouring medium, skewer and an Iron not shown

Place your stencil on to the Foamiran and draw around the flower with a skewer or similar, I used the smallest size on the stencil,


After you've drawn round the flower shape, cut it out with some scissors,


At this stage I coloured the centre with a copic pen, you can of course use the medium of  your choice,


On the reverse of the flower, take one petal at a time an hold it against your iron ( which is set on silk) for a couple of seconds,
Take this directly to your mold, mine's from my stash but I know 14 craft Bar has similar in store,


Repeat this process for every petal till all petals have a pattern on them,


I then added three of the stamens glued together at the base and adhered them in the centre of the flower, you can of course use any stamens of your choice,

.................................................................................
I also made some Mistletoe with some Air Dry clay from my stash and some Brown Foamiran on the ends, I then hand cut the leaves, Agnes has some Air Dry for sale in her store now too,


As you can see here I also added some chunky glitter to the ends of the stamens on the Christmas Roses to finish them off,

Inbetween the flowers I used some of the fabulous leaves available at 14 Craft bar too,


I then finished off my Lantern with a bird embellishment from my stash,


Full view again,


Products used:


Hope I've given you some inspiration,
Happy Crafting!!!