https://lizscreativecorner.blogspot.com/http://lizscreativecorner.blogspot.com.au/p/my-canvases-and-altered-art.htmlhttp://lizscreativecorner.blogspot.com.au/p/my-tutorials.htmlhttp://lizscreativecorner.blogspot.com.au/p/challenges_24.html

Pages

My Lovely Friends,

Monday 29 October 2018

Pretty In Purple

Hi guys, as you know I love the shabby chic look so I've been having some fun creating this card using some of the gorgeous Lemon craft papers from the Violet Silence basics collection, wow do you know how hard it to find Lemon craft papers in stock!!! not easy I can tell you, lol


I made a 4.5 inch by 6.5 inch based card then used various papers from the paper pad, I layered some of these up dding 3D foam to raise them and then added some bits of  lilac voile and some chipboard pieces from my stash,


The flowers are a mixture of WOC and Sweet lilac, I coloured the tiny buds with some oil pastel to blend them into the colour scheme, i gave most of the chip boards a little hint of Vintage Photo distress ink over the top, 


I couldn't resist buying the sheet with the most adorable butterflies on too, I fussy cut it out then layered it onto the card with a couple of pieces of waste chipboard layered up underneath,

Challenges 

Happy Crafting

Thursday 25 October 2018

A little Shabby Chic Creation Today

Hi guys, I thought I'd show you today a shabby Chic styled card I've created, using some Lemoncraft pieces i had left in my stash, yes I'm running really low and do you know how hard they are to find!!! so here is my card with what I had left, he he


I used the papers from the House Of Roses collection and like I said I only had scraps left, anyway I layered them up fussy cutting around some of the flowers from the papers, adding some 3D foam in between then I used a layer of sisal on the top, I added a window made a with a mould and extra light air dry clay which came from 14 Craft Bar, after it dried I simply added some white Gesso then when dry  a little vintage photo distress ink here and there,


Onto this I fixed a gorgeous paper butterfly again by lemoncraft,


I then added some of my handmade foamiran flowers made with 0-32 Fushia from 14 Craft Bar and  Lady E Designs dies Tiny Flowers,
along with some leaves made with the Tiny Leaves die again by Lady E Designs,
To finish off the card I used some chipboard pieces and a little Gesso painted here and there too,

Happy Crafting,

Friday 19 October 2018

Open every Door

Hi guys, I thought I'd show you a mixed media display I've made using stuff in my stash along with some Dusty Attic chip boards, as you know I'm in a mixed media mood at the minute and who I am to fight it!!!, lol

Of course me being me had to make something rather hard to photograph, but hey your used to that aren't you? lol
I used 3 embroidery hoops in various sizes then managed to get some canvas on a roll which apparently they may not do anymore, still I had enough for this right!


So my main frame is around 12" I think, and i used the hoop the other way as I thought the door by Dusty Attic looked fab sat inside the hoop rather than on the top, if you get what I mean, so after taking my Prima sprays I added a little stenciling with some home made paste, then coloured some Dusty Attic bricks with white Gesso, a layer of texture sand then some acrylic paint to finish them off,
I painted the door with white Gesso then again used my sprays but before they dried I wiped a little of the ink off with a wet wipe, then when dry I added some crackle paste here and there, then another thin layer of the spray put on with a brush over the paste, I fixed a piece of the 49 and Market paper behind he open works at the top, I then found a metal piece in my stash and fixed it on with 3D Gel,

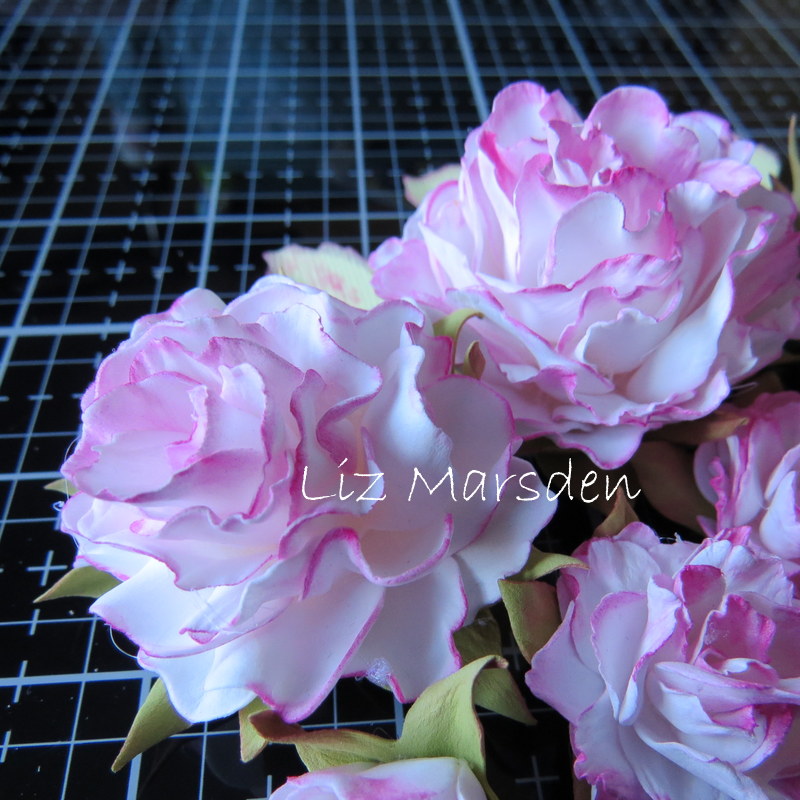
I fussy cut out some flowers from a piece of 49 and Market paper, from the sweet Reflections collection, so love these and the paper is a fabulous quality too, I added these on both sides of the door which I had raised up with 3D foam pads and then glued it onto the canvas again with the 3D gel, when dry I added the heart tree embellishment to finish it off,


I went for a trip to a craft shop the other weekend ( quite a trip) lol and near the fabulous shop was some grass, on the grass were some trees were a few branches had fallen off, I picked a few up and brought them home and ta da ths is one of them which I've left in its natural state, just simply adding some paper flowers on the top,
The butterfly came off a laser cut sheet off the 49 and Market papers,

This is a Dusty Attic piece which i coloured with white Gesso, then a layer of texture sand and then used a cosmic shimmer granite paste which really made it look like stone, I added some cheesecloth, moss and layered up flowers including one of the 49 and Market paper ones and a clock face from a Maj Design paper, then a butterfly which I cut out of a strip from my stash,
The background was sprayed first with the inks then I used a stencil with some silver paste for the trailing leaves, I later added a bit of the lilac and greys to tie it more in with the other two, ( see main photo)


I again used the sprays by Prima, but this time I wanted to make a feature of the cheesecloth, so i kept it on show and as loose as possible, I then added another Dusty Attic chip board piece on the top, this I coloured with white Gesso dabbing it on with my brush so it gave a little texture, then i again used a fabric flower and another of the die cut ones, as before I then gave the middle of these some texture with some micro beads, I finished the embellishment off with a butterfly from the same paper pack,
Full view again,

Challenges:
October 2018 Mood Board
I used the wood, door, scene, blues, nature, outside,

Any questions feel free to ask!!
Happy Crafting!!

Wednesday 17 October 2018

Without Change There Would Be No Butterflies

Hi guys, I've got a mixed media creation to show you today which I made by combining them with some of the fabulous products from


I have a little step by step tutorial for you on how I created this,
Take the Gummiapan Large old tag die and cut the tag out of some card board, ( I Used some old Packaging from a delivery)


At the same time die cut the bottom section of the tag again,


Spray both pieces of the tags with some water on the right hand side, then spread it a little with your fingers,

Gently pull back the top layer of the card board so it leaves the corrugated section showing, it is fine to leave patches of the top layer still in place, as shown below,


Do the same for the other piece too,


Paint your card stock tag with a layer of gesso, then when dry add some inks or sprays of your choice, I used some Prima Colour Bloom sprays,


After the sprays are dry I added a little of my handmade structure paste but you can use Grunge paste or similar, dry well, I also added some on the other section too, sorry not shown on the picture below!


When the structure paste was totally dry I stamped up a brick stamp by Gummiapan over the top using some Memento ink pad in Tuxedo Black,
I then added another bit of the sprays here and there,

This shows the structure paste added on the smaller section, on top of which I have stamped another  Gummiapan stamp over the structure paste which I did in the same way as above, I then cut the height of the section down a little,


At this stage I used three colours of the memento ink pads, just gliding them along some of the colour card stock by crafters companion, at this stage you can die cut some more tag sections out of thick card if they need it for extra strength at the back,


Then taking the Gummiapan butterfly stamps in Medium and the large sizes I stamped these over the top, this way each butterfly gets different colours,


Fussy cut them out,


To finish my tag off I used some eyelets from the mixed meadow pack on the bottom of the top section and the top of the lower one, joining both by adding some jump rings through, I then used a Laser Owe Love chipboard piece, keeping it in it's natural state, 
then I glued the butterflies in place,


How it looks on the wall,


Products used:


Happy Crafting!!

Monday 15 October 2018

Tiny Flower Tutorial

Hi guys, I have a popped a video onto you tube showing you how I made these cute flowers using Lady E Designs  Tiny Flowers and Leaves 001


Hopefully you will also see the video here, I am very new to this, so please be kind!!! 

Happy Crafting!!

Wednesday 10 October 2018

Commissioned Foamiran flower display

Hi guys, I thought I'd show you a display of flowers I was commissioned recently to make, the lady picked the colours and shape she wanted after having seen some similar flowers I made a while ago,


I made the larger flowers out of white 0.6 Foamiran and two colours of oil pastel, the Foamiran and the stamens in the centre came from 14 Craft Bar,


These flowers were made using a peony die by craft passion, I also made some hand cut calyx's for behind them using 0.6 Green Foamiran again from 14 Craft Bar,


I made the rose look smaller flowers using the same die, however I didn't scrunch the petals before adding them to the wire,


I made these flowers out of a Lady E Designs die Tiny Flowers and made the centres out of some beads in my stash,


I wrapped floral tape around the wire stems and added some leaves using another Lady E die from the Leaves 001 die, I then used a mould from my stash to add the detail on them,


Thankfully she loved them. Lol

Happy Crafting!!

Friday 5 October 2018

Just beause - part 2

Hi guys, a few days back I showed you some of my latest flowers made with Lady E Designs dies and on my post I said I'd show you in a few days what I used them on, so here it is,


I've had this teal light holder in my stash a while just waiting to be decorated, as you can see I used the leaves die 003 with card stock which shows you can use them on more then just cards etc too,


I actually used some of the cardstock leaves to help keep the hanger upright in place, simply glunig some of the leaves behind the handle and in front too,


This is the side view ,

Hope you like my finished project, let me know if you make any too,
Also being cheeky here if you ave visited my blog would you leave me a comment as i'm trying to see if my comments section of my blog is working, thank you
Happy Crafting!!

Tuesday 2 October 2018

Just Because

Hi guys, I was in the mood for creating flowers at the weekend out of Foamiran and so this is some of the ones I made,


I used the fabulous Flower 004 Dies by Lady E Designs for the rose type flowers, using silk foam in white and a versa colour ink pad in Magenta to colour the petal edges,


I then used the Poinsettia dies for the calyx's behind the flower heads, using some olive green Foamiran and the same ink pad on the edges,


I also used the Leaves 003 dies again by Lady E designs but cut these out of card stock and again edged the leaves in the ink pad to tone it all in,
I will show you in a couple of days how I used these!!!

Let me know what you think,
Happy Crafting!!!