https://lizscreativecorner.blogspot.com/http://lizscreativecorner.blogspot.com.au/p/my-canvases-and-altered-art.htmlhttp://lizscreativecorner.blogspot.com.au/p/my-tutorials.htmlhttp://lizscreativecorner.blogspot.com.au/p/challenges_24.html

Pages

My Lovely Friends,

Showing posts with label 14 Craft Bar DT. Show all posts

Saturday, 21 April 2018

My latest display with foamiran Flowers

Hi guys, I want today to show you a collection of flowers I've made as a display using some of the fabulous Foamiran from Agnes at 14 Craft Bar,
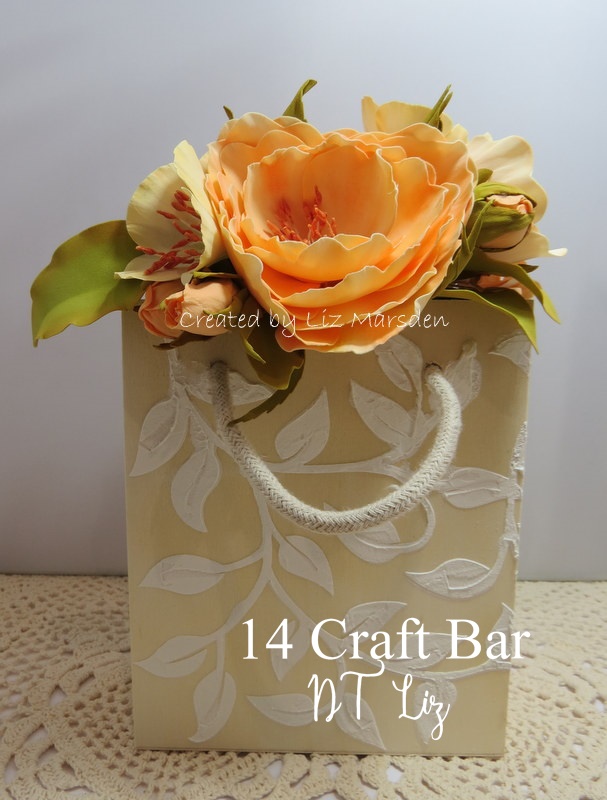

I've made quite a few flowers using the same  multi flower die, just using different sized petals and gluing them in a different way too, this means one die set can give lots of beautiful flowers for the cost of one die set,


I used 0002 Ecru Foamiran as the base of most of my flowers, then I simply coloured the petals with some oil pastels, for this flower I used a die from my stash, after cutting out the petals I scrunched the petals up after colouring with the oil pastels and then spread them in the middle of the petals leaving the tops scrunched up as much as I could, For this flower I also used some stamens,


This flower was made using the multi flower die using the next to largest sized petal and again some of the stamens, I also coloured the edges of the petals with some oil pastel but in a lighter colourway this time,


This small rose bud style flower has Ecru foamiran on the outer petals with some Apricot silk foam for the inner ones, again the multi flower die was used for these,( please excuse my glue strings, they always show more under the lamp I use to photograph my images with) these can be easily removed of course!!!! LOL, I then used some Olive Green foamiran for the leaves just colouring the edges with another oil pastel too,


Again I made this flower out of the Multi flower die, colouring the edges of the outer petals the same way and using some silk foam in Apricot for the centres,


Here is another of the style of flower I showed above,


Here I used the Multi flower die using the 3rd sized petal up for a Rose Bud styled flower again using the Apricot Silk foam and Olive Green for the leaves,
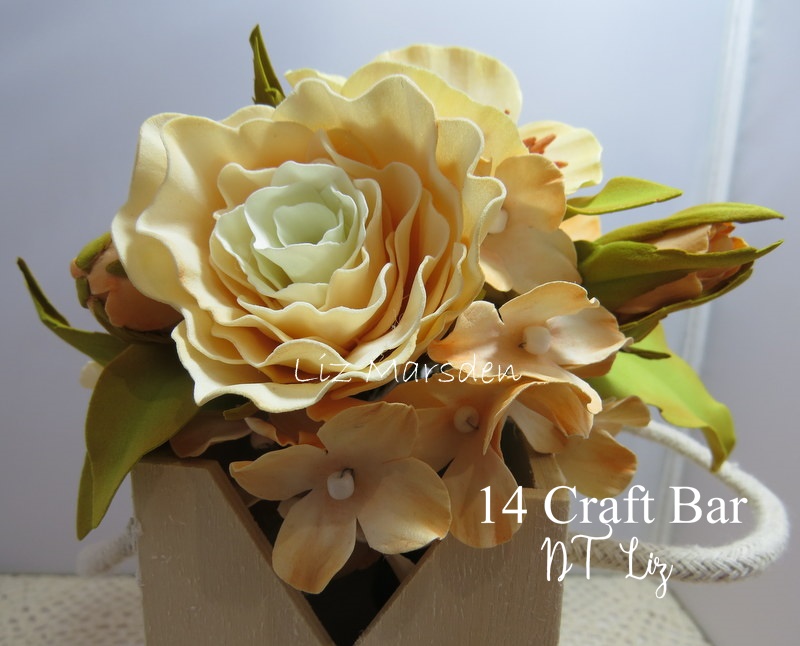
This open curly rose styled flower was made using pale peach Foamiran for the outer petals coloured with the paler oil pastel as used before for another flower, then I used the Ecru Foamiran onto which I added no extra colour for the centre petals, 


I used the Rosy Dot die AC2  and the pale peach Foamiran for the small flower bunch , these I coloured with the oil pastels and added a tiny button from my stash for the centres, this style of flower bunch makes a great filler for the display as shown,


This is the finished top view of my flower display, where you can see most of the different types of flowers I made,


As you can see I arranged the flowers with some larger hand cut leaves and more rose buds,


Have a go at the different styled flowers you can make with the fabulous range of Foamiran, stamens, dies and stencils plus lots of other products over at 14 Craft Bar too,


 Happy Crafting!!!

Saturday, 16 December 2017

Altered Christmas Lantern with Christmas Rose Tutorial

Hi guys, it's my turn today for some inspiration for
14 Craft Bar
So  I thought I'd show you a Lantern I altered, 
I bought this metal lantern from a local store just crying out to be altered with some Foamiran flowers and foliage, all links below


So I started out by adding some gesso in white painted here and there, then onto the top section I added some cheesecloth and some sisal, on the lower sides I added some tiny foam balls from my stash,


I created all the flowers for the top section using various Foamiran, stamens, leaves and stencils,


I made the Poinsettias out of the fabulous  Red Foamiran using the awesome Stencil 06, I also cut the Holly Leaves out with this stencil too,


As you can see I also made a few Christmas Roses too, these I made using he stencil 01 with white Foamiran,
......................................................................................
Christmas Rose Tutorial:
You will need:
Foamiran of your choice, stamens, mold, stamens, copics or other colouring medium, skewer and an Iron not shown

Place your stencil on to the Foamiran and draw around the flower with a skewer or similar, I used the smallest size on the stencil,


After you've drawn round the flower shape, cut it out with some scissors,


At this stage I coloured the centre with a copic pen, you can of course use the medium of  your choice,


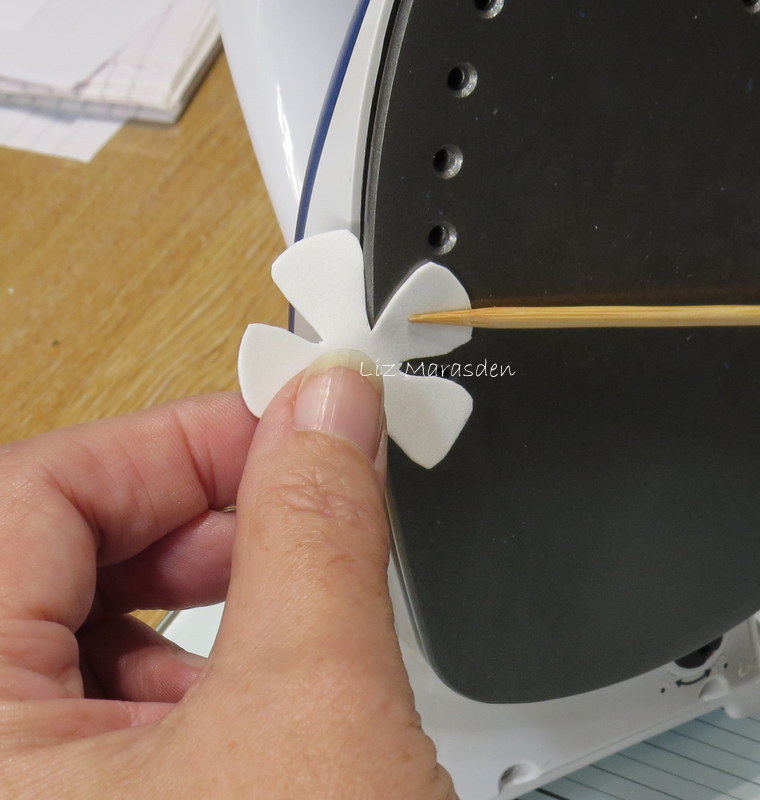
On the reverse of the flower, take one petal at a time an hold it against your iron ( which is set on silk) for a couple of seconds,
Take this directly to your mold, mine's from my stash but I know 14 craft Bar has similar in store,


Repeat this process for every petal till all petals have a pattern on them,


I then added three of the stamens glued together at the base and adhered them in the centre of the flower, you can of course use any stamens of your choice,

.................................................................................
I also made some Mistletoe with some Air Dry clay from my stash and some Brown Foamiran on the ends, I then hand cut the leaves, Agnes has some Air Dry for sale in her store now too,


As you can see here I also added some chunky glitter to the ends of the stamens on the Christmas Roses to finish them off,

Inbetween the flowers I used some of the fabulous leaves available at 14 Craft bar too,


I then finished off my Lantern with a bird embellishment from my stash,


Full view again,


Products used:


Hope I've given you some inspiration,
Happy Crafting!!!