https://lizscreativecorner.blogspot.com/http://lizscreativecorner.blogspot.com.au/p/my-canvases-and-altered-art.htmlhttp://lizscreativecorner.blogspot.com.au/p/my-tutorials.htmlhttp://lizscreativecorner.blogspot.com.au/p/challenges_24.html

Pages

My Lovely Friends,

Saturday, 28 November 2020

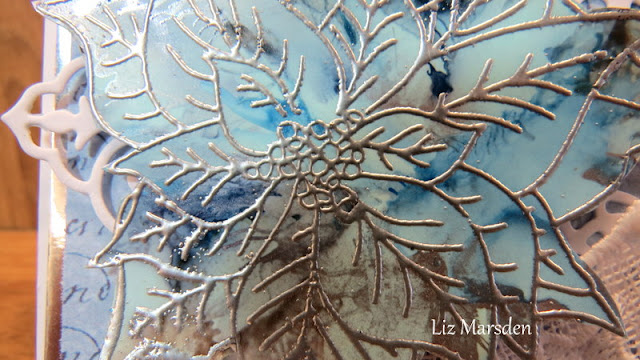
A little Alcohol ink Poinsettia

 Hi guys, do you like to do new things? I do I'm always looking for something different to try, so the other day I used some Alcohol inks on some Yupo paper I bought from 

That's Crafty,


I did a background on the Yupo then using this Poinsettia stamp, I heat embossed it with some silver embossing ink,


I used a copic air gun but it's running out so this is all I've managed so far, but it's something I will certainly be giving another go soon,

Happy Crafting x

Thursday, 26 November 2020

More 13@Arts projects

 Hi guys, I'm back today with some more of the 13@Arts samples I created for the show on Hochanda for That's Craft,


I don't usually do vintage, (can you tell) lol but these fabulous images and elements in the paper pad Art Vol1 was just to enticing for me not to use, I layered the fussy images up with the End Of Summer papers, distressed on the edges and just added a little lace from my own stash to finish it off,


Another creation I did was alter a box from my stash, I simply painted the box with some white Gesso, then when dry I added some of the Ayeeda mist in Pastel Cinnamon by simply stroking it along the box with my finger, this gives a distressed look, then I added a little of the beautiful Rice paper on the lower half of the lid,


I distressed the sides with the mist in the same way then using the Multi purpose Gel and some of the amazing Golden Calcite Golden Glow water colour paint mixed together, I stencilled through the Oxford Street stencil this adorable leaf,

I shall be back soon with the other projects I created soon too,

Happy Crafting!!

Wednesday, 25 November 2020

13@Arts samples for the Hochanda shows today

 Hi guys, 13@Arts are on Hochanda for That's Crafty today at 7am and 10am, 

I love 13@Arts and had such fun working with the gorgeous products,


I made a couple of tags using the awesome foiled acetate as the base with paper layers from the End of Summer papers with fussy cut images from the Art Book vol 1, I hand dyed some white twine with some of the Pastel Cinnamon Ayeeda Mist and added hints of the fabulous Gold Glitter on the flowers,


If your still looking at Christmas creations and yes I am there are some wonderful images and papers too, I made this as a Christmas Bauble styled card, I added some of the End Of Summer chipboard leaves in amongst the fussy cut images onto which I added some of the Gold Glitter, sorry the photo doesn't show the shine!!


I love to create on canvases, so I used some 13@Arts stencils from my stash along with the Oxford Street stencil with the Multi Purpose Gel Medium,  when dry I sprayed some of the Ayeeda Mist in Pastel Cinnamon, again when dry  I used over the top gorgeous images which I again had fussy cut from the Art Book Vol 1,

I really love this image and I layered it on top of some of the leaves from the same paper pad and one of the window shutters from the paper pad too,

I will post some more of my creations soon,


13@Arts challenge 96


http://13artspl.blogspot.com/2020/11/wyzwanie-challenge-96.html

Happy Crafting!!


Thursday, 19 November 2020

A Winters Night

 Hi guys, I altered a MDF Bauble from my stash with a wintery scene, I love to create with blues, silvers and hints of white,


I started by adding some Tapestry stencilling from Finnabair with some Modelling paste through, when dry I went over the top with two colours of Heavy Body Acrylic paint in Azure and Mediterranean,

I love building up with layers so I used some of The Dusty Attic snowflakes which I had first painted with some Finnabair white Gesso and a plastic snowflake from my stash,


I then added some of the Dusty Attic houses , these I again painted with the blue acrylic paints to give a variety of colours,


I finished off the house, the snowflakes and over the raised stencilling with some Finnabair Old White Wax,


I finished off the scene with hints of Finnabair Snowpaste here and there to create added interest and went around the edge here and there with some Brushed Iron Wax, I also added some Wishing Bubbles too, then used some Finnabair metal stars,

 Most of the products came from The mad Scrapper

Finnabair:

Tapestry stencil

Impasto heavy Body Acrylic Paint -

Azure

Mediterranean

Old White Wax

Brushed Iron Wax

Snowflake paste

Metal Stars


The Dusty Attic:

Snowflakes

Houses by Nuneka


49and Market - Wishing Bubbles - Minty Breeze

Happy Crafting!!


Monday, 9 November 2020

Christmas Cards/same products/ different look

 Hi guys,

 so the Christmas Season will soon be here, so I thought I'd show you two Christmas cards I've created using the same designer papers by Prima from the Sugar Cookie collection, using the let's build A Snowman and Together For Christmas

Janine from The Mad Scrapper sells these and lots more designer papers plus mixed media and lots more, do check them out,

So for the first one.. 

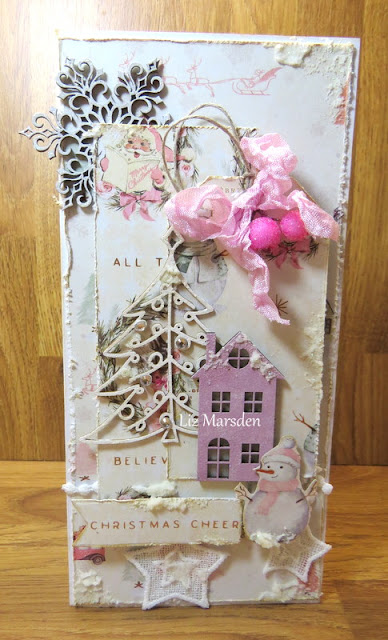
A slimline styled card


I distressed the paper edges with a distress tool and added a little vintage photo distress ink on the edges,


I used one of the Dusty Attic snowflakes behind one of the paper layers, this I painted with Finnabair heavy white Gesso, then while still wet I added some fine glitter over the top, this sparkles in real life gorgeously,


The main focal point of the card has a Scrapiniec Christmas Tree behind A Dusty Attic house by Nuneka, I coloured the tree with the same white Gesso, the house I painted first with white Gesso then when dry went over with Finnabair heavy body Dusty Rose acrylic paint, I glued them in place then when set went over with some Finnabair snowflake paste on the top of the houses and the tips of the tree, I also added some Dusty attic clear gems here and there on the tree too,


I fussy cut around one of the cute snowmen from the Let's build a Snowmen sheet and one of the Sentiments off the Together for Christmas paper sheet, simply adding more of the Snowflake paste for added interest,

Card number two....


So this time a 5" x 7" card, with the same papers only with the Snowman papers on the base and the Together for Christmas on the circle, again I used a fussy cut snowman and another one of the sentiments off the paper, I added some clear gem stones by Dusty Attic and the Snowflake Paste, A small Dusty Attic snowflake from the same set is painted again with the white Heavy Gesso with fine Glitter over the top,

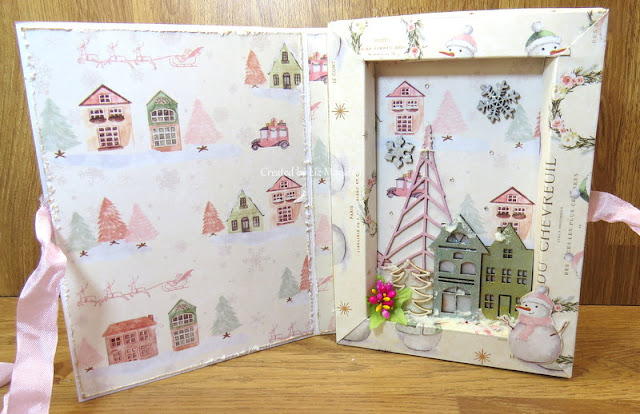
This time there is added interest on the inside of the card, with a scene created in a shadow box,


I've left the left hand side plain with only the Together For Christmas paper but it will eventually have a verse added, 


So I created a Shadow Box using both papers, then bulit a scene inside with the same chipboard sets I used on the first card,


The large Scrapiniec tree is again painted with the Dusty Rose paint but I mixed it with a little white Gesso to lighten the colour, the houses are painted with Sparks Fairy Wings and mermaid Sparkle, I adhered a smaller Scrapiniec tree left in it's unadorned colour at the side of the house and added some tiny Dusty Attic pearl effect gems on the tips, when fixed in place and set I went over with some of the Finnabair Snowflake paste on the roofs, tree points and on the shadow box base,


Again a fussy cut Snowman is on box too, I added some of the Dusty Attic gems on the back of the scene too,
 

Prima paper - Sugar Cookie / Let's Build A Snowman

Prima paper - Sugar Cookie / Together For Christmas

Dusty Attic:

Houses by Nuneka

Snowflakes

Clear Rhinestones

Pearls 

Scrapiniec  Christmas Trees

Finnabair:

Snowflake Paste

Sparks - Fairy Wings

Sparks - Mermaid Sparkle

Impasto Ink Dusty Pink

Heavy body White Gesso

Tim Holtz - Vintage Photo Distress Ink

Happy Crafting!!

Wednesday, 4 November 2020

Christmas is on it's way

 Hi guys, being as it's not too long off Christmas and seeing as I usually make a 3D project every year for the season I thought I'd show you one I've created this year,


I created the cute houses with the Amazing paper Grace Charming Cottage Box dies,


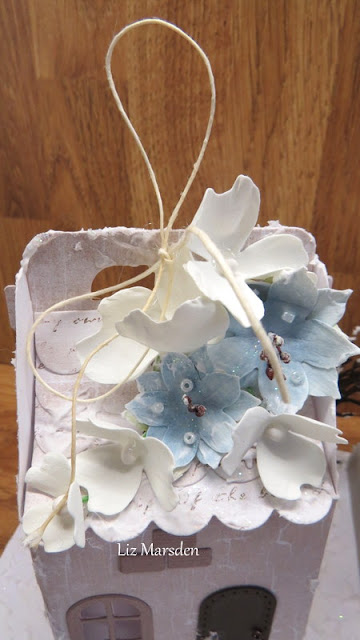
I made some of the windows on this one so you could see inside, I made the inner pieces of the window as faux stones for the walls, on the roof I created Poinsettias with the APG Poinsettia dies, then used some Cinch and Go IV for the other Foamiran flowers,


Some stamens, twine, glitter and glass beads finish them off,


For the middle house I created a porch, I made the roof effect using the Elegant Twist rectangles die, with some wooden skewers for the posts, inside the porch I used the Christmas tree die, cut a few times to create a 3D tree, at the rear of the house I created a winter tree using the Spooky cottage tree die, again cut a few times to create a tree in the garden,


Again I used the same dies for the flowers, but this time I added some pearl string, larger glass beads and a snowflake die from the Grand Christmas lattice Arch die set,


This time I added some vellum behind the window frame and again used the inners from this for the Stone effect on the walls, with the same flowers and Snowflake on the roof,


I used more Christmas tree die cuts to create another couple of trees for the outdoor, these I added some texture paste too as I did on the base of my scene and here and there on the houses to create the look of snow,


I usually do my scenes to light up, so I created a space in the back of the left hand side house for a battery tealight to be added,


I love the way it reflects on the snow,


Last but not least this is the side view, this time I added a die cut Christmas tree inside one of the windows too,


Happy Crafting!!