https://lizscreativecorner.blogspot.com/http://lizscreativecorner.blogspot.com.au/p/my-canvases-and-altered-art.htmlhttp://lizscreativecorner.blogspot.com.au/p/my-tutorials.htmlhttp://lizscreativecorner.blogspot.com.au/p/challenges_24.html

Pages

My Lovely Friends,

Wednesday, 28 August 2019

Thank You Gift Envelope

Hi guys, have you been having the gorgeous weather? we have and it's been lovely to sit outside a while and not have the rain and cold, lol

Anyway when it was raining and was cold I made this gift envelope using the fabulous Resin
Thank you by Sarah from her the resin embellishment shop, it's part of her online All Day Crafting shop which has some other fabulous items in too,
I left it in it's natural colour this time as it went perfectly with my papers as it is,


I've made my envelope box to hold a bar of chocolate or similar,
The papers are Lemoncraft Grow Old With me collection and the Butterflies and the paper clock are by Lemoncraft as well,

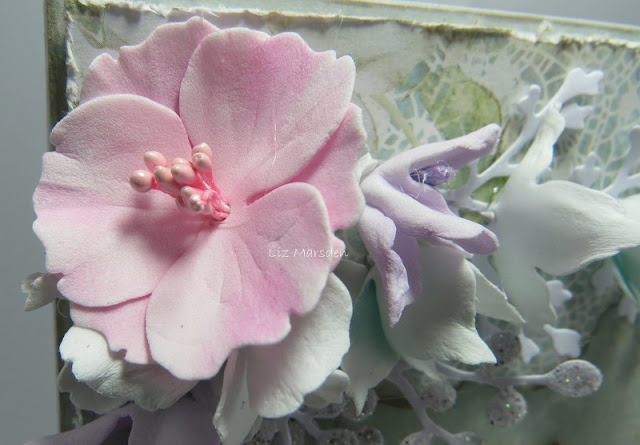
I made some Foamiran flowers out of Lady E Design dies flower 5 and the Roses out of the Flower 6 Poppy dies,


Sorry no chocolate inside, it would melt!!!! or I've already eaten it, you decide!!! lol

Do check out the fantastic resins and other products Sarah sells in her online shop,
She also sells on Facebook,
Happy Crafting!!!

Thursday, 22 August 2019

Wonder Land

Hi guys, I'm here today with my post for the amazing BlooMar Chipboards, these chippies are fabulous and can be left in their natural state or they take paints and mixed media fabulously too,
I created an exploding box with the Alice chipboards sets


I bought these fabulous Alice papers by Stamperia and created the Rabbit hole!! beneath a tree, I had some twigs/branches in my stash so I glued them onto one of the papers with a tree on and added some moss at the top for leaves, below I added  a different type of moss as well to look like roots,
I  fussy cut down one of the smaller Alice images then layered some 3D foam behind her to appear she was falling into the hole, ( I think I'd seen this done somewhere and thought it looked fab so borrowed it, ) I then added one of the texts from a paper in the collection,


As per usual it's a little hard to photograph so I have taken some more individual ones below,


I fussy cut down some of the images from the paper set and used them with some of the fantastic BlooMar chippies, these are in their natural colour, just coloured with a little vintage photo distress ink on the edges,


As you can see I raised the images with 3D foam pads and raised one of the bottles too,


I cut out a door scene and layered a keyhole chippie over the top,


I added a chipboard card in front of two paper ones, again layering them up,


In the middle of my box I added this fabulous rabbit and text chippie, I simply glued this onto a piece of clear acetate to make the rabbit appear to stand up, I added a little more moss near the base as well,

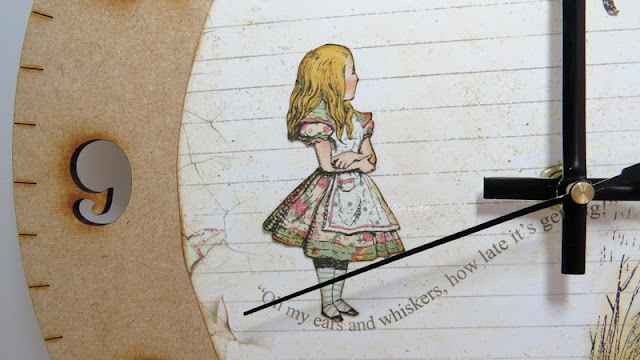
While I was doing this I had a MDF clock in my stash and so used the papers and characters for that too,


To leave room for the hands I simply added another chipboard card to this, which I had simply added some vintage photo distress ink on the edges,


I fussy cut another Alice out and glued her flat onto the paper,


I did the same with the cat and branch and again added a little moss,

BlooMar chipboards


Happy Crafting!!

Monday, 19 August 2019

Another Wedding Day Card

Hi guys, you may have seen that I am currently a guest for Sarah Wright from 
I received some gorgeous resins in my DT kit and this beautiful heart is no exception,


I gave the heart a coat of white Gesso then added a little silver glitter on the top and bottom of the heart too,

This looks lovely in real life as the glitter shimmers subtly, I added a couple of Foamiran flowers around it made with Lady E Design dies  Flower 001 and Tiny leaves,


I cut the leaves out of white card and coloured them slightly with a little ink,


I added a hint of the same Glitter on some of the leaves too,


I created the base of the top layer with another Lady E Design die using one of the Borders,
Beneath this I added one of the fabulous Word sets 009 by BlooMar Design,
The papers are by Mintay which I also got from Sarah,

Wednesday, 14 August 2019

Wedding Day

Hi guys, recently I told you I was very lucky to win a candy off Craft & You papers, one of the papers collections I won was Sweet Time,
These papers are simply gorgeous, I love the soft images and colours,


I loved this image that much I didn't want to add lots of layers etc to it, so I only cut two base layers and made the image the main layer,


I added some glitter onto the back of the dress and in her hair continuing this throughout the card,


As you can see I used the adorable Wedding Day chipboard  words set 009 by BlooMar design, simply adding a little glitter on the dot on the i, the rest is left in it's natural colour,
On the top of the card I added another fussy cut section from the paper, then added some of my handmade flowers over the top,


I used Flower 6 Poppy die, Tiny Flowers, Flower 5, Flower 001, then leaves 6 herbs by Lady E Design Dies, using white 0,.6 Foamiran and Silk Foamiran, I coloured the flowers with Versa Colour ink pads and added the same glitter to the leaf dies from the herbs set,


please Excuse my glue trials, my glue gun is playing up again at the minute!!


I wanted the flowers to trail down the card and some go across to fit in with the style of the card,


Here you can see how the glitter shines on the leaves,

I shall be making more beautiful wedding creations out of these gorgeous papers as I really love them,

Craft & You design - Sweet Time Papers

happy Crafting!!!

Monday, 12 August 2019

Magical Garden

Hi guys, as you know I'm guest DT for
Sarah and her resin over at
One of the Resins I got in my DT package was this fabulous Fountain Bird/Bath,
which I thought went well with a little Mixed Media,
I saw the wonderful colours on the Lindy's Gang moodboard, so based my colour theme on that,


I added some white Gesso to ithe fountain first then on the base of the fountain added some Lindy's Gang embossing powder, leaving bits of the white showing to create an aged effect,

I painted an old Paint brush with some white Gesso then coloured over that with some Flat Magical - ocean breeze blue, I then wrapped some twine around the handle so I can hang it up as well as giving it a little added interest, I also did the same colouring with the BlooMar chipboard Frame,


When I'd glued these onto my brush I started layering some flowers from my stash, along with some more BlooMar chipboard leaves pieces and some metal pieces too,
The leaves I coloured with Gesso then went over with Lindy's Gang Opal Sea Mist and Magical Industrial Chic - Steampunk Sepia,
I  then used one of the Finnabair Mechanical flowers in among the flowers for a little contrast,


I had these Dusty Attic fairies in my stash and thought well they went fantastically with my magical garden, these I painted with gesso, then magical Shaker Oom Pah Pah Pink and went over with Lindy's Gang embossing powder in Geranium Coral Blush,


Do check out the fabulous range of goodies Sarah sells in her online shop and the wonderful Resins from her Resin Shop,

Challenges
Lindy's Gang - August mood Board


Lindy's Gang:


Happy Crafting!!!

Believe

Hi guys, how is the hols going? I'm busy with my Granddaughter a few days a week so on one of my free days I felt in a mixed media mood,

As some of you know I'm GDT for 
Owned by the lovely Sarah, one of the resins she sent me was this fabulous birdbath fountain, which just screamed to be used on my altered brush, lol

I saw the fabulous mood board on Lindy's Gang and so used the colours,
I got some old brushes off my hubby and so I began by painting the handle with some white Gesso first, I added a couple of layers till it covered the black of the handle, I also painted with Gesso the chipboards and the resin Fountain,
When dry I painted the brush with some watered down Flat Magical Ocean breeze Blue, again I did a couple of light coates, then I dried it with my heat tool, I wound some twine from my stash round the handle and top of the bristles sticking it in place with hot glue,
I used a chip board frame by BlooMar designs on the top of the brush which I had also painted first with the Ocean Breeze Blue, when this glued down in place I adhered the fountain onto the middle section of the brush, I added a layer of Lindys embossing powder on the base section of the fountain leaving parts uncovered to give an aged look, the top I left with the Gesso,

After the fountain set I glued the rest of my embellishments on too,
I added some flowers and metal pieces from my stash, I again used another BlooMar chipboard for the leaves shown at the base of my brush, I painted this with white Gesso first then went over when dry with Magical - Mermaid Seashells in Opal Sea Oats and Magical - Steampunk Sepia,

I used a couple of Dusty Attic Mini Fairies on my brush which after painting with white Gesso I then did a layer of watered down Magical shaker - Oom Pah Pah Pink then went over this with Lindy's embossing powder - Geranium Coral Blush,
I used the same Magical shaker - Oom Pah Pah Pink for the small flower shown under the Finnabair metal flower, 

I used the same steps for the smaller D/A Fairy too,

Well I hope I've shown you how fabulous Sarah's Resins are and how they can be used with mixed media so well,
The resin Shop is on FaceBook and also available at her online shop
Craft All Day, do check out the gorgeous products Sarah sells in her online shop,


Happy Crafting!!!

Sunday, 11 August 2019

Latest Poinsettia dies and winter leaves by Lady E Design

Hi guys, just thought I'd pop by with some Poinsettias I've created using white 0.6 Foamiran and the latest Poinsettia and winter leaves dies by Emelia,
As you know i'm lucky enough to be on her DT and so as soon as I got these I just had to have a play!!, lol

I used some different versa colour ink pads to colour them, and also used different stamens in the centres too,


The Poinsettias come in two sizes, which are fab sizes for cards or other projects,


I will have a project to show you using some of these flowers and leaves soon,


Happy Crafting!!!

Thursday, 8 August 2019

Birthday Card For A Man

Hi guys as you know we have a few men in our family and they love a handmade card, which as you know aren't the easiest thing to make!! lol

My Nephew's Birthday is today and so I created this card for him,


I was so lucky recently as I won a candy off Craft & You Design were I won two paper collections this Vintage Man being one of them, the papers are fabulous with some great vintage images but my Nephew isn't really into Vintage so I just used the other papers in the set, I cut the papers out of some Label dies I have in my stash,
I really wanted a clean crisp look to the card so I kept to the same colour ways,

I also cut a few cogs out of the papers as well as some from the black,

I used the fabulous Happy Birthday Chipboard by BlooMar design for the main Focal point keeping it in it's natural colour, 


I then added a metal star by Finnabair to finish the card off,

Crafts & You Design - Vintage Man

Happy Crafting!!

Tuesday, 6 August 2019

Just Another Day In Paradise

Lol, is the song in your head now?

I just wanted to show you this fabulous window by Woodouts that I altered for myself,
I love creating, and so I mixed my love for mixed media with my love of art, fussy cutting, layering,  chipboards, textures and colouring with paints etc and of course Holidays!! 

I saw the awesome colour challenge over at Dusty Attic and thought it would go perfectly for my design,

The moodboard has palm trees on, oh be still my beating heart!! I don't know why but I love love love palm trees, yep my idea of holiday heaven!! lol
So my tropical scene has one,
It's a MDF one I've had in my stash for ages probably years just waiting for the right time, I painted it with Finnabair paints then with Lindy's Gang too, I added some Dusty Attic pearls in the middle of the leaves for some texture too,
The main window frame which like I said is from Woodouts have you seen the other stuff they do, I mean yes please, they do a gorgeous seahorse which I really need too!!! lol
any way I went a bit off track there, so the window frame is painted first with white Gesso then I went over with Finnabair stone effect paste, this added fab texture here and there, when dry I again painted it with some Finnabair paints then went over with Lindy's Gang her and there as well, I finished off at the last minute with some Finnabair wax,

As I mentioned I wanted to add some Art into my design so I used a Antique frame by Dusty Attic which I painted with some burlap acrylic paint by Finnabair, then I cut a piece of canvas to fit behind, coloured a background as if the start of a scene and glued it behind the frame, my posh canvas, lol the paint brush keeps in the theme, I fussy cut out some seaside images from  Mintay and layered these up with cut off pieces of chipboard, recycling!!! he he
Below this is a piece of cheesecloth which I coloured first with some watered down Burlap paint, dried it and glued it onto my window frame, 

on the right I added some D/A Fishing Net, you can just see it if you look, this I trimmed down into shape, coloured with two colours of Finnabair paints and swiped a little white Gesso and burplap paint over the top with a wet wipe, I will tell you below how I did this,

At the side of my brush I added a fabulous Resin Beach Hut by Sarah, I simply added some white Gesso first then when dry took some metallic paint by Finnabair onto a doubled over  piece of wet wipe  which was over my finger, dabbed off some excess then swiped it over the hut, this gives a fabulous weather beaten effect, all sun drenched and salty air!!! well in my head anyway!!!

I added some drift wood again by D/A below which I painted first with white Gesso, then again swiped some of the burlap paint over the top,, then when nearly dry took a clean piece of wet wipe and swiped some of the burlap paint off, this gave a beached look to the wood,,

I layered up some Art stones and real shells plus a fussy cut star fish, as well as a D/A Ships Wheel which I had coloured in the same way as the frame but I then went over with some Lindy's gang  Magicals here and there too,

I added a metal Label, added some twine to the ends, glued it in place then finished off my scene with a D/A Bird and a few flowers from my stash,

Well I hope you like it, it's my Paradise and would love to be there, lol

Products used;
Finnabair - impasto paint - Burlap, Mediterranean,
metallic paint - Emerald Ocean, Gold Rush
Stone Effect paste,
Art Stones,
Wax - Mint Sparkle,
Mechanicals - Antique Labels

Lindy's gang;
Flat magical - Ocean Breeze,
Magicals - Mermaid Seashells, Opal Sea Oats

Dusty Attic chipboards;
Fish net, Small ships wheel, birds, drift Wood,

The Resin Shop - Beach hut


Woodouts are having a DT call at the minute, why not check it out,


Challenges:
August Mood Board Challenge

Happy Crafting!!!