https://lizscreativecorner.blogspot.com/http://lizscreativecorner.blogspot.com.au/p/my-canvases-and-altered-art.htmlhttp://lizscreativecorner.blogspot.com.au/p/my-tutorials.htmlhttp://lizscreativecorner.blogspot.com.au/p/challenges_24.html

Pages

My Lovely Friends,

Thursday, 28 February 2019

Inspire

Hi guys, wow the weather has been gorgeous here, so I've created an altered wooden peg with mixed media and some flowers made out of Lady E Design dies Flower 5 - Hydrangea, using some vellum,

I love to mess about with what I have in my stash, the peg I've had ages, so I started with that and went from there,
I used some of my own stencil paste with a stencil from my stash, again which I've had forever, lol
I then layered up my peg with a gorgeous chipboard frame 012 which I cut in half and leaves from BlooMar design, I have a link below to a you tube video on how I created the tag if your interested,
The flowers and leaves like I said are cut out of good quality vellum, these I then coloured on the back with distress ink,
I added some stamens in the centre from 14 Craft bar,


The resin frame I've had again forever in my stash, hmm think spring is in the air!!! anyway I added a text behind it and fixed it onto my peg,

Here I used more vellum flowers and leaves from the set, with another set of leaves from the floral elements set 001,
You can also see some of the builders tape type stuff hubby gave me, on top of this and here and there I added a few dew drops,
I then went over the whole thing adding a little gesso here and there in white,

here is the link to my you tube video


Happy Crafting!!!

Tuesday, 26 February 2019

Birthday Girl

Hi guys, It's my Sons Fiance's Birthday today so I made her this card,

I love this paper set by Mintay from the Dear Diary collection, so I used one of the papers for the base, then I fussy cut out some of the different fabulous images from the same set,


I layered up two of the oblongs first, then used a BlooMar chipboard frame kept in it;s original colour, I then layered up the book pile with some 3D pads,

Then I used thicker foam pads to add the fussy cut out flower over the top,


Isn't the flower gorgeous!!

See you soon,
Happy Crafting!!


Wednesday, 20 February 2019

Foamiran Hydrangea styled flowers on a mixed media project

Hi guys, Have you seen the latest fabulous Dies

  Flower 5 - Hydrangea and Leaf 5 - Vine 
by 
Lady E Designs

They look gorgeous when used with paper and or Foamiran, I showed you some I'd made the other day with white 0.6 Foamiran and today I'm going to show you how I used them with a link to a tutorial I have done showing how I coloured and created them too,


As you can I am in the mood for spring!!! Lol
So I started with a Styrofoam egg which I painted with some white Gesso first, then I used some Powertex mixed with some small art stones, brushing this onto the egg, then I let this dry, then I went over parts of the egg with a watered down blue paint made with Lindys stamp gang Magicals, when dry I went over with a washed down Gesso again, this made the colour subtle but still gave a hint of colour,


Using some more of the Powertex I added some cheesecloth around the middle of the egg, with some cotton threads over the top, again I let this dry,

When dry I painted the cheesecloth and threads with some Finnabair Sparks paint in Unicorns Hair, let dry, I then used some of the Unicorn paint to roughly paint under where the flower display would be too,

I then started on my created Hydrangea flowers, I first cut down the stems off the stamens as close behind to the flower heads as possible,
Taking some sisal in a natural colour I hot glued some to one side of the egg, then arranged my Hydrangea flowers over this alternating the sizes and the colours,


Closer view,


On the top of the egg, I used another latest Lady E design die Leaf 5, this I cut out of some paper then I coloured here and there with some soft pastels,

I cut a few more the same way, then snipped bits off  and placed them here and there among the flowers,


I then finished off the egg with some larger Art Stones and a Air Dry clay bird I made with a mould from my stash, this sits above some twigs which I had collected off some trees when the wind was howling earlier in the year!!! , see recycling!!! Lol

Here is the link to my You tube channel video showing how I created the Hydrangeas,
https://youtu.be/DJtlpRxGoRs

Hope you like it, as always any questions, just ask

Lady E Designs
0.6 Foamiran white - Swedish House crafts

Happy Crafting!!!

Friday, 15 February 2019

Happy Birthday

Hi guys, It's my Neighbours Birthday today and he is a lovely friend too, 
He is 82 Today and loves Nature, gardening and light colours,

So hmm a male card with light colours, not so easy!!! Lol

So I've made this,


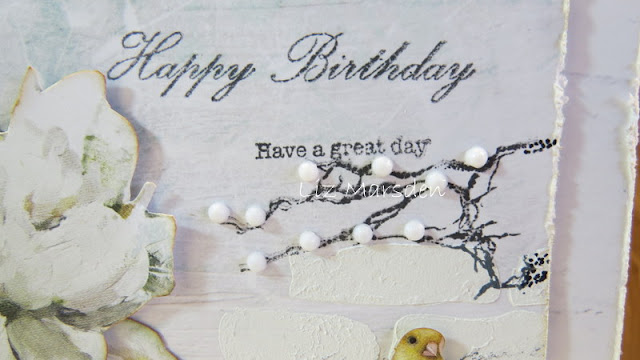
I used some 13 Arts papers from the Until Dawn pack, Frosy Morning and days and Nights, the background paper had a little script on them so I have added some to the front piece too with a text stamp,


First I used some Texture paste I made through a TCW mini bricks stencil, I then placed a piece of plastic over the top carefully, then lifted it off equally carefully before it dried, so it give some more texture on the bricks, I then let it dry naturally, when dry I stamped the above mentioned script here and there,
I had this adorable laser cut Bird from a 49 and Market paper sheet which went perfectly with the colours and the size, I had this spade handle stamp which came free with a magazine so I stamped it onto a piece of mirri card on the back, cut it out, then re stamped the handle part in Kraft card stock , also cut that out and glued that on top,


I added some handmade Foamiran flowers at the base of the spade shaft using 0.6 Ecru Foamiran and Lady E Design die Flower 001 using the smallest size,
The wellies were a Magnolia die and I cut these out of another sheet of 49 and Market paper too,
I then edged the wellies with some vintage photo distress ink and layered one up with 3D foam,


I fussy cut these flowers out one of the sheets from 13 Arts, again distressing the outer edges, then layering up one with 3D foam,


I finished my card off with some more of the free stamps and some white self adhesive dots from my stash,


Happy Crafting!!


Tuesday, 12 February 2019

To My Valentine

Hi guys, I've another Valentines day card to show you, again I have used some of the fabulous Chip boards from BlooMar Designs,


I used some 13 Arts paper I had in my stash then I simply distressed the edges,
I layered the smaller layer up with 3D foam too,


I added some Frantage Aged Ivory onto the chip boards,


The chip board took this really well,


I made a Foamiran Rose bud out of 0.6 red foamiran and Lady E Designs 003 Flower die, then made some Leaves out of Lady E Designs 001 leaves die, I then used the Lady E Design 002 Die for the Calyx too,


Happy Crafting!!!

Sunday, 10 February 2019

Hints and Tips for Foamiran and Silk Foam

Hi guys, recently I was asked about Foamiran and Silk Foam and what I find useful to use with them,

The basics I find helpful to have are:

Foamiran, Silk Foam.

Iron, Kitchen Foil, Flower and leaf dies, Colouring mediums, Floral wires, Floral tape, Glue,

..............................................................

I like to use 0.6 Foamiran though you can also buy 0.8 which is a lot thicker, both of which I find need heat to be able to shape the petals etc, both are available in different colours.

0.8 Foamiran needs a heat source to shape the petals, leaves etc, I find an Iron works best for me though you can use a heat gun and a naked flame, (from a candle etc)

0.6 Foamiran can be shaped with out an iron, but I have a touch of Arthritis in my knuckles so find the help of an iron helps me shape it, especially when rolling over the top ends of rose petals etc,

Silk Foam again comes in various colours and is very light and easily stretches into shape, this doesn't need heat from a added heat source as rolling between your fingers is enough to make the Silk Foam get into shape,
..................................................................

An Iron - a travel iron is handy as it is small and I only use mine for shaping the flower petals and leaves, which if previously coloured can transfer to the iron, it means you don't need to remember to clean it off before Ironing your clothes too!!!
..............................................

Kitchen foil -  is used to make foil buds for the centre of Roses etc, the thinner cheaper kinds are best for this, 
  roughly tear a square shaped piece off the roll, (amount depends on the size of the finished tear shaped foil bud you need), then scrunch it between your fingers shaping it into a tear shape bud. wider at the base and narrower at the top
.....................................................................................

You can use dies to make the Flowers or hand cut them, I find dies are handy when I wish to make a few quickly as they can be run through a die cut machine up to 6 layers at a time and of course all are the same size and cut evenly,
I have of course hand cut my petals, leaves and calyxs and these are fine too, especially if you want a certain size,
.................................................................................

You can colour both Foamiran and Silk Foam easily with a few different colouring mediums,

  Geletos - added with a cheap cut up washing up pad,
Oil pastels -  can be used the same way,
Soft Pastels - I add these with a damp wet wipe,
Ink pads - Using a piece of washing up pad

.................................................................................................

Floral Wires - are very handy if you wish to make flowers which you want to arrange into a display, these can then have floral tape added over them to give a more natural look and they can cover where you add a leaf to a wire to give a more finished look too,

.................................................................................................

Glue is needed to attach petals to form a flower, or to add leaves,

I tend to use Hot glue from a glue gun, be careful of your fingers, they can easily get burnt!!!!

Nail Glue or Super Glue can be used too, these are good for adding petals and leaves to wires and don't add bulk, again be careful with your fingers as your skin can easily stick too,

.......................................................................................................

I have a few tutorials made with Foamiran at the top of my blog, showing how I make flowers and leaves with them,

I hope you find this helpful, any question feel free to ask me,

Happy Crafting!!!


Friday, 8 February 2019

To my Valentine

Hi guys, I was asked for a commissioned Valentines card, so I thought I'd show you what I made for it,


I used some papers from Anna Marie Design for the backgrounds, layering them up and distressing the edges as you know I like to do,


I used the adorable Bloo/Mar chipboard Heart 001 keeping it in it's natural state as the main focal point, then I simply made a banner with a printed text over the top, 


I also wanted to use some of my hand made Foamiran flowers. so I created a couple of roses in pale pink 0.6 Foamiran  using the Lady E Design Flower 001 dies using the third size up for the layers, then I used the same die set but in the smallest size for the white and ecru flowers,


I cut some paper leaves out of the Lady E Design Leaves 003 Dies, simply adding a little distress ink on the edges and creasing them in the centre to give a little shape,

I added a little twine and some stamens from my stash to finish the display off,

Anyway he loved it so phew that was good, Lol

Happy Crafting!!!

Wednesday, 6 February 2019

Two from One

Two from one i hear you say, what's she on about, well I made two different types of Foam flowers out of One die set,

The die set is 003 Flower die by 
Lady E Design
I have quite a few photo's so sit back, have a cuppa and enjoy!! lol

I made the lemon roses out of 0.6 foamiran in lemon and the frilly flowers are made out of white silk foam coloured with geletos,


I made my roses with a large foil bud in the centre then covered with the 4th sized die from the 003 die set, I also made some hand made calyx's with olive green 0.6 foamiran, 
I made some buds in a similar way too, varying the amount of petals to make different sized finished buds,
 Using the same die set I made these frilly type rose flowers, using white silk foam coloured with Geletos Squid ink, Mango and Blueberry, 

I also used some of the stamens 011 from 14 Craft Bar inside,
I also made some bud style flowers in the silk foam too, again with a hand made calyx,
I then made some leaves out of the white silk foam using the Lady E Design die Leaves 001 again coloured with Geletos,


I made myself a floral display using this vase I had bought, into which I added layers of fine coloured sand and some metal like stones, then another layer of the fine sand,
It sits on my dining table, and gives a lovely hint of summer on a cold day, lol

Suha at Swedish House Crafts now sells Foamiran and some of the Silk foam too, check it out,

If you've any questions just ask!!
Happy Crafting!!!


Saturday, 2 February 2019

Look what's coming

Hi guys, Emilia Lady E Designs has some gorgeous new dies due out into the shops very soon,
here is some flowers I've made using white 0.6 Foamiran and coloured with  soft pastels and a we wipe,


The flowers are in three sizes, I've used two here and have the veins in them already, they also come with two sizes of the leaves shown here,


The other die set due out soon is a leaf one with gorgeous swirls on too, as seen below,


As some of you know it's my Birthday today so it was like a lovely early Birthday treat for me when they came in my DT package, Lol

Happy Crafting!!