https://lizscreativecorner.blogspot.com/http://lizscreativecorner.blogspot.com.au/p/my-canvases-and-altered-art.htmlhttp://lizscreativecorner.blogspot.com.au/p/my-tutorials.htmlhttp://lizscreativecorner.blogspot.com.au/p/challenges_24.html

Pages

My Lovely Friends,

Saturday, 6 May 2017

Elegant Lady

Hi guys, I'm here today with another card I made using the gorgeous Crafteezee Elegant Ladies collection, this collection was full of beautiful papers and embellishments, like them all to be honest, lol
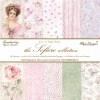
I used the gorgeous papers from the kit by Maja Design 6" x 6 " Sofiero paper pad, layering them up  by tearing and distressing the edges, I also used a little vintage photo distress ink on the edges too,
In the paper pad are some images and so I made this Elegant Lady the main feature, I added a little DD structure paste here and there too on the edges,
I threaded some vintage seam binding behind the image then threaded it through one of the  metal embellishments from the kit, again adding some structure paste on top and a flower from my stash
Underneath the image I used a adorable Wycinanka parasol in the kit, then again adding a flower from my stash, I finished off the card with some of the beautiful Louisa lace that was in the kit, and a pearl heart at the top again from the kit,
Do check out these gorgeous kits that you can order and pre-order  here,

Happy Crafting!!
Challenges:
Deep Ocean - Anything goes
The Ribbon Girl - anything goes


Thursday, 4 May 2017

Sitting here thinking of you masking tutorial

Hi guys, I made a card the other day just for fun using some of the new stamps from Magnolia and I thought I hadn't shown a masking tutorial for quite a while either, lol


I used a Go Kreate die for my base, coloured up the images with distress inks and  a little glitter and Frantage were  added here and there too,
I must admit before i started I hadn't thought of Tilda's with Willow branch having a straight leg which was fun using it with a sloping branch!!!  from the Magnolia Kit stamp, doh!! but not not be beaten I persevered he he,
so here goes!!!

First I stamped Tilda with Willow branch onto my watercolour paper, make sure you leave enough room around the image for any image you wish to add,
Then stamp the same stamp onto a post it note or anything which will take the stamp and will also be removable, as you can see I fussy cut around the bottom of the stamp and cut off the top as my masking was only going near the legs and so I didn't need to fussy cut out the top bit, if using a post it note make sure you stamp it where the glue strip is, so it will stick on top of your stamped image, 
shown below,
next, take the branch from the Magnolia kit stamp and stamp the branch onto a stamp a ma jig or similar, mine is a different make but it does the same thing, so place the angled piece of your masking tool against the rectangle piece, then take your stamp onto your stamping block and stamp fitting the block into the angled corner, this leaves the image shown below,
This is where it got tricky!! as I wanted the branch going the other way!!! so I moved my stamped image on the rectangle piece around till I got it where I wanted, this meant I had to place the L shape on the other side, but somehow it still worked!!! I honestly don't know if this was a fluke but it worked this time, lol

this is with my stamping tool removed, before I removed the masking post it note, as you can see it is perfectly alright to have bits of the image left on the post it note,


Now as you can see Tilda is touching the branch on her hand, below her knee and near her boot, I made this seem more by colouring those parts to look like more branch or shadow!!

So you see you can always tweek things if they go slightly off from what you intended!! lol

I then added some more stamps and a little Frantage to soften the look, added some flowers from my stash, seam binding and a tag too,

I've left this blank for now, 
Well I hope you enjoyed my tutorial, and hope it shows you can tweek things if needed, lol
Happy Crafting!!

Challenges
Midweek Magnolia's - Favourite colours
Deep Ocean - Anything goes
Magnolia-licious - Anything goes option of summer

Monday, 1 May 2017

Sharing my awesome news!!!

Hi guys, Ohhhhhhhh I'm so excited to be able to tell you today that I am now part of the
I will be showing you what I have made with the Crafteezee collections, which as you know are monthly collections from Tracy, they contain secret products till you open the package which is a fab, a bit like Christmas!! but once a month, lol
Anyway enough of my babble, of course it's the first of the month so it's time for our challenge which this time is,

Add lace

I made this for my mums 87th Birthday which was yesterday!!

I used some of the products from the "Elegant Ladies" collection which has sold out, but the next one May - Life is a Journey is due soon and is available to order here,
The gorgeous papers are from the Sofiera collection by Maja Design 6" x 6" pad and I distressed the edges and machine stitched them, Tracy sells these in her shop but they are out of stock at the moment, however if you drop her an e-mail she will see what she can do,

I also added the beautiful Rhinestone Butterfly embellishment which was in  the collection too, here and there I added a hint of a die cut made with the  Fantasy Magic Lace die,

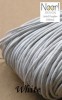
I made a feature out of one of the papers by cutting out one of the images, ( my mum loves pink and roses) cut two more pieces of the same size out of  some of the papers, then layered them up slightly off center and tied them together with some waxed cord in white, I will link to the other products used you can buy from Tracy's shop below,
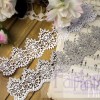
At the base of the card I added some of the gorgeous Louisa Lace which again was in the collection, plus the adorable flowers, I simply added some Dutch Doobadoo structure paste to these, the trailing leaves die by Rosy owl and a pen nib all from Tracy's shop,

I also added a feather from my stash to finish off my card,

 Here's the full view again, which also show's the adorable pearl hearts which were part of the collection too,

Inside I used some more of the paper, distressed and machine stitched them, then wrote a verse for her:

Today you're eighty seven
A very big event,
But what a lot of puff ....
....You'll need
To blow those candles out!!

Challenges
Fussy and Fancy Fridays - anything goes

She likes it when I make up verses for her and they are much more personal aren't they!! lol 
Happy Crafting!!


Sunday, 30 April 2017

Anything goes at LHOSM with a no heat Foamiran flower tutorials too

Hi guys, I'm here today with my first creation as a DT member for the 
we are being kindly sponsored by Noor design UK

The theme  is 'anything goes'
 so I thought I'd show you another Easter creation I had made,
I used Sitting Spring Tilda and Forget me not Tilda, both are coloured with my distress inks, then fussy cut out,
I made my Easter eggs in the same way as I did the last ones, there is a tutorial at the top of my blog on how I altered them, only this time I added a hint of lace on the edge, then again I used some cheesecloth in the center of the egg for Tilda to sit on, I also used some vintage seam binding  at one end of the egg,
In this half of the egg I also added a feather too, I fixed some moss in front of Sitting Spring tilda and some glitter style eggs too,

To finish off the scene I added a  die cut tree, onto which I added one of my handmade air dried clay butterflies,
The  flowers are made with a Spellbinders Hydrangea die, and the larger ones with one of the Rosy Dot AC3 dies, with some Foamiran, I will pop a little tutorial on these below,


I cut out this La La lands tree die out of some chipboard simply adding some natural coloured Foamiran tiny flowers too, using a Cheery Lynn baby's breath die,

 Hydrangea Flower tutorial: 😊

Fold your Foamiran in three and run through your die cutting machine,


Separate all the flowers and colour on both sides with a wet wipe or wet kitchen roll piece with some Gelatos,

Place the coloured flowers onto a foam mat and using a small ball tool press in the center of each flower,

Use as required,

Larger flower Tutorial:

Fold your Foamiran over four times and run the larger and smaller six pointed petal dies through your die cutting machine (makes two flowers)
shown here


I coloured the flowers the same way as before,

Fold the Foamiran petals together then twist and roll the flower over in your hands and between your fingers till they resemble these below,

open up the flowers and  very lightly smooth the middle of each petal with your fingers, when all pieces are done to this stage, take your glue gun and layer on top of each other using two larger ones below then two of the smaller flowers next, staggering the petals each time, I left these with out stamens this time,


I think they look slightly like a water lily, but that's just me, lol
Challenges
All about Magnolia - All about Easter or spring

Deep ocean - Spring
Magnolia-licious - Anything goes

Do join us over at LHOSM 
We so love seeing your creations,
Happy Crafting!!

Tuesday, 25 April 2017

Orchid style Foamiran flowers

Hi guys, i thought I'd show you today a few Foamiran Orchid style flowers I have been having a play with, I love to play about with some of my dies and see what I can come up with, lol

I used the three petal die from the Rosy Dot Heart Flowers die to make them and a scalloped circle  1" die,
below is a small tutorial on how I made them,

I have missed a few stages out because I think by now you all know how to cut out the foam, see my other tutorial if you wish to check it out though, lol so anyway using  four layers of Foamiran folded over and the three petal die, place through your die cutting machine and do the same for the scalloped circle die, I then coloured them both with some Victorian Velvet distress ink,

I then took a distress ink pen in Tea Dye and drew some lines and dots from the center of the scalloped circle dies only , as shown below
Then take a medium sized ball tool and a foam mat and press down in the centre of the scalloped circles as shown below,


Take the three petaled flowers and fold the petals together, then roll and scrunch in your hands and between your fingers, till they look like these above, you need two of the three petaled flowers and one scalloped circle for each Orchid style flower,


Gently spread the petal out again using your fingers in the middle of the petals trying not to touch the tops of the petals too much,
on one of the three petaled flowers carefully tear off one of the petals, leaving two as shown above,


Take your glue gun and layer the two petaled flower on top of the three petal, keeping the torn edge facing down, stagger the petals as shown, don't worry about the torn edge as it doesn't show when you glue on the  scalloped circle on top, sorry forgot to take a photo of this stage!! grr

when set, make a hole in the middle of the circle and add some stamens of your choice,

Hope you've enjoyed my little tutorial and have a play with your dies too, 
Happy Crafting!!!