https://lizscreativecorner.blogspot.com/http://lizscreativecorner.blogspot.com.au/p/my-canvases-and-altered-art.htmlhttp://lizscreativecorner.blogspot.com.au/p/my-tutorials.htmlhttp://lizscreativecorner.blogspot.com.au/p/challenges_24.html

Pages

My Lovely Friends,

Showing posts with label we do doobadoo. Show all posts

Saturday, 6 September 2014

Something Feminine at We Do Doobadoo

Hi guys, I'm back today for our something feminine challenge over at we do doobadoo, I just couldn't resist doing another canvas, so into these at the moment!! I created a scene this time using two of the DD stencils with some grunge paste,

I started off with a 6x6 inch canvas and made a circle out of a post it note so it would stick in place on my canvas, then I used a few strips of washi tape to make a cloud effect, doesn't matter which you use it gets covered up with paint sprays after, mine was by Tim Holtz and the design on it was a washed out look,
make some of these strips long enough to go slightly onto your circle/moon mask,
I sprayed my canvas at this stage with Prima Bloom Sprays in the colours Glistening waves, Lime wedge and Vintage metal/Gold foil,
remember to do the sides of the canvas too,
I took away my moon circle shape carefully and placed the washi tape strips which were left on top of my mask down onto the moon shape left behind the mask, then using a hint of the gold foil on a tiny brush I just brought the colour onto the moon here and there on the edges, this was to take off the bright white look and give a softer effect,

closer view of washi strips and lightly coloured moon, I think this effect looks fab and will use it again,
Next I stenciled the stars 470.715.014 and faded dots 470.715.004  using grunge paste, this time I wanted the natural grunge paste colour to show so this is why i did this after using my sprays,
the gorgeous chipboard Devine frame is by Dusty Attic, I have adored their stuff for ages and finally found some for sale in the uk who had stock!! as they run out so fast lol,
For this effect I first cut down a part of the frame I wanted to use and painted the it with gesso, when dry I went over with Luminarte silks in Golden Monarch, Moss green, Persimmon, and Chestnut Brown, these looks gorgeous in real life as they subtly shimmer, to finish off I added a few flowers from Sweet Lilac in similar colours,

I made the swans out of Fimo Classic clay, just doing what I thought a swan would look like, I used hand rounded longish pieces for the neck tapering them off at one end, place these too one side, then rolled a larger piece of the clay with a rolling pin and hand cut out feather shapes, to these I scored lightly with a knife for some fine feather detail and just layered them up in the body area and near the lower neck were I thought they looked ok,
I made a tiny hole for their eyes and baked them in the oven, when dry i added black for their eyes and a little orange for their beaks,
I also used some more of the fabulous Dusty Attic chipboard too, the love mini word 1, was done the same way as the frame above and the Lavender I did a little different as i covered the top part of the flower with embossing powder for a little added texture and depth then used the Golden Monarch Silks on the top and did the same colours of silks on the stems,
To finish my canvas off I added some dragonfly charms, a tiny hint of cheesecloth, pearls and a pearl string for the top of the water effect,
if you have any question just ask,


I hope you join us in the fun at we do doobadoo,
Hugs Liz xx

Saturday, 28 June 2014

Welcome to your new home

Hi guys, I'm back today with our latest challenge for we do doobadoo which is 
pins and pearls,
I've made this display for my Daughter and her hubby who are moving into their new home soon, we will be helping them with a few jobs which need doing first like painting and decorating etc so I made their card now lol,

As you know Kay's not into overly fussy or fancy so I've tried to keep it fussy free well for me at least!!!
Some of the DD products were in my latest DT package and were fab timing for what i needed to make,
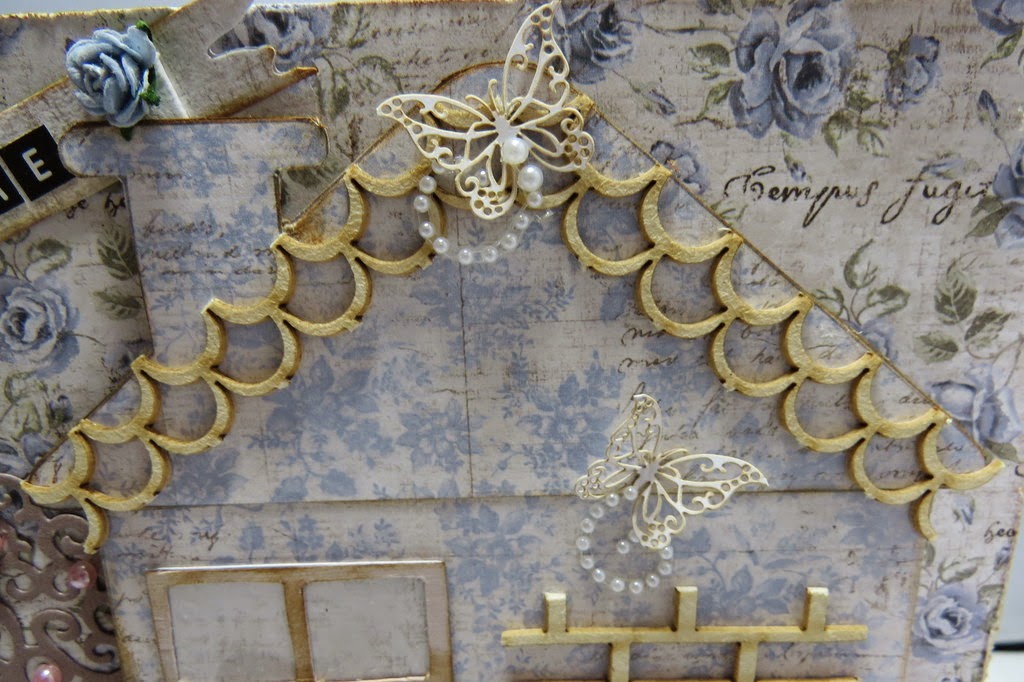
I cut the house shape out of card stock and Maja Design paper from Live and love crafts then using another of the DD templates adapted the window and the door, I used the window template but left a border round, I didn't want a perfect look to the border so it kept in with the shabby chic theme, I stained the frame with distress ink here and there and add acetate behind with a small piece of another Maja design paper behind that,
the brick effect is made with a new soft board as is the roof design, all links below,

Closer view of soft board and window, to finish off the roof and to add some pearl detail I added a couple of paper art butterfly and a pearl flourish for their tails,

At the bottom of the display is one of the new paper art fences  and in front are a couple of the paper art flowers, as you can see there are a couple of pearls on here too,  the tree is a la la la crafts die and i added pearls on this also for blossom, 
the DD paper art keys I slightly edged with distress ink in vintage photo,
For the front garden of the house I used a  DD brick stencil with grunge paste for texture and detail, I should have heat dried this as it made my card  base wobble lol,
here too you can see the pins  I got from Live and Love crafts,used with my flowers from Sweet Lilac, Tilda with Ice and on the road Tilda are coloured with my copics then fussy cut out,  too these I have then added a strip or two of acetate behind to make them stand up,
Closer view of brick stencil,
Dutch Doobadoo Dutch Mask Art A5 BricksDutch Doobadoo Dutch Paper Art A5 ButterfliesDutch Doobadoo Dutch Paper Art A5 KeysEnglish Doobadoo - A5 Paper Art - Borders
English Doobadoo - Card Art - PillowSoftboard Art - HoneycombDutch Doobadoo Dutch Paper Art A5 Flower PotsDutch Doobadoo Dutch Softboard Art Bricks

All above items are available at Polka Doodles or here

Hope you will join us in the fun, remember you don't need to use DD products to enter but if you have any we do love to see what you have made with them,

Challenges
Crafty Calendar challenge - pearls and petals
Magnolia Forever - 2 or more characters
Deep ocean - favourite colour combo/ blues, browns/ pinks
Tilda's Town - The great outdoors
Marvelous magnolia - anything goes
Fussy and Fancy - Summertime
Sweet lilac - Summer holiday
Dutch Magnolia challenge - anything but a card

Happy Crafting!!
Hugs Liz xx

Saturday, 31 May 2014

Kay and Ant's Wedding Anniversary card

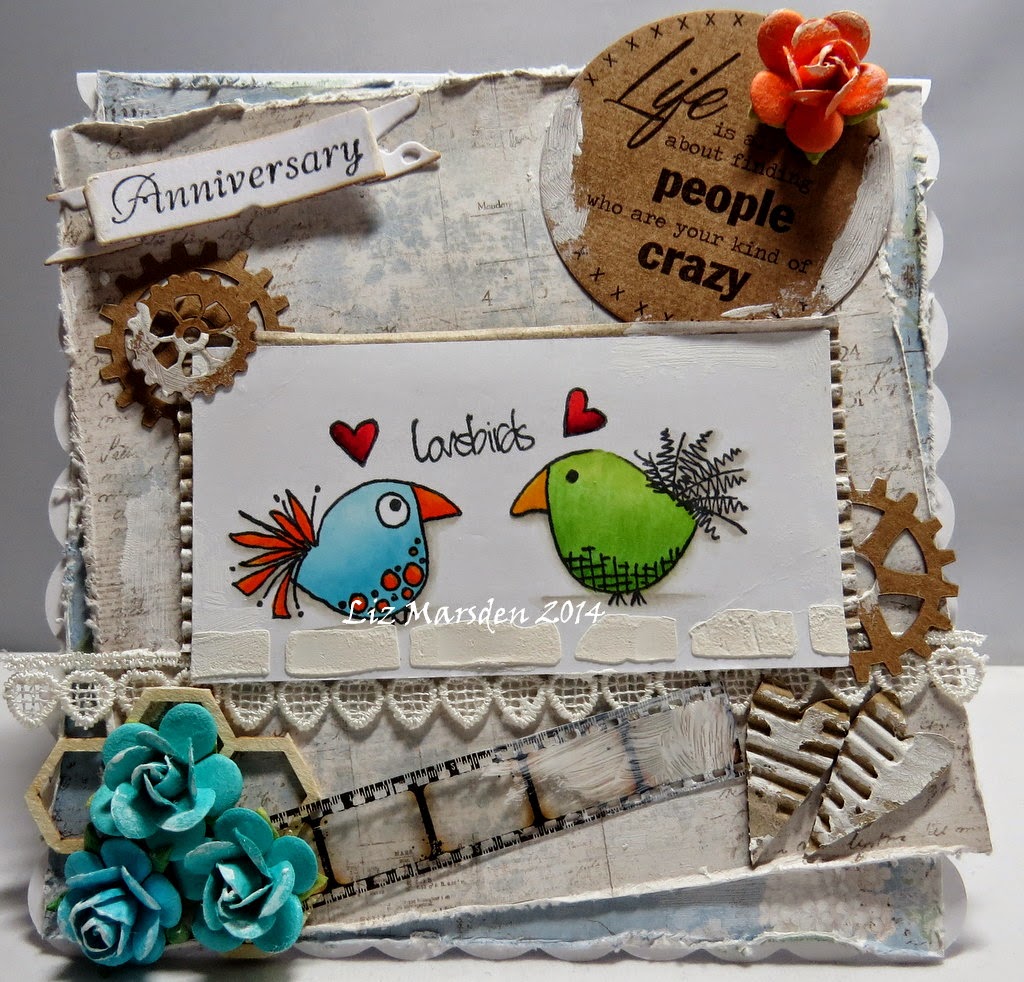
Hi guys, It's my daughter and Son-in laws wedding anniversary today and  over at we do doobadoo the challenge this time is different shapes, so I have made this card in a modern style as as I've said before kay doesn't really do foofiness!!!


The DD products used are:
Label art sentiment - 474.007.001
The stamp is called Love birds by Jofy, so love this quirky stamp!!!!
The papers are by Maja Design Vintage summer Basics from Live and Love Crafts,
I used homemade 3D paste for the brick stencil, and finished the card off with flowers, gesso, lace and a Tim Holtz film strip,


Copics
Blues B000, B00, B01
Orange/yellows - Y17, Y38, YR16, YR07, YR04,
Greens - YG11, YG03, YG13, YG17
Reds - R17, R37, R59

Challenges
Fussy and fancy - Outdoors
Simon Wednesday challenge - Anything goes
Deep ocean - Wings
That's Crafty - it's all about texture, use texture paste

see you soon,
happy Crafting!!!
Hugs Liz xx