Hi guys i'm back today for the mid week challenge at Totally Tilda which is
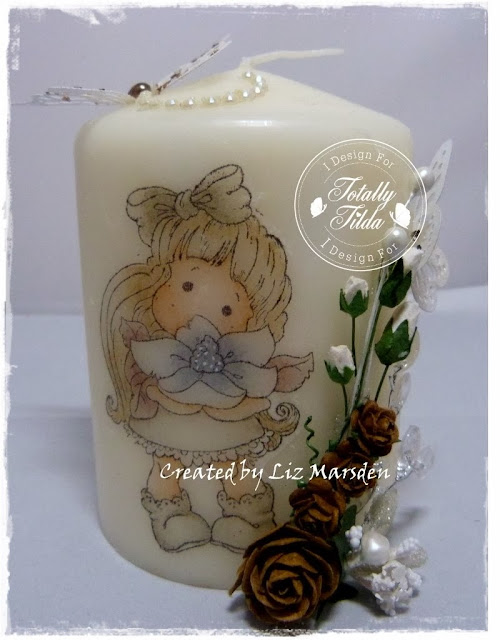
Tilda on anything but a card, this time I've decorated a candle which goes with last weeks coasters and my decorated tissue box too,
I'm full of a cold so hope it makes sense lol
I'm full of a cold so hope it makes sense lol
As you can see I've used one of my favorite Tildas Magnolia Tilda and have coloured her onto tissue paper with my copics, then added a few pretty flowers and Joy craft butterflies to finish it off,
Below I am adding a small tutorial on how i did this candle
Take your chosen image and colour her with your chosen medium, like I said I used copics, I usually have two layers of the tissue paper with one underneath the image to absorb any seeping from the copics, this is later thrown away, the copics don't tear the tissue but don't be too heavy handed with the colouring or it will saturate the tissue paper,
After colouring carefully cut the image out leaving a narrow border around the edge, don't worry about this as it disappears when heated so I have not cut out between her legs,
Place your image onto the candle where you want it to be, then carefully take a larger piece of grease proof paper and wrap it round the candle and hold at the back
Take your heat gun and carefully go over the image, going not too close as it will start to melt the candle, the image will go from opaque as seen above to clearly visible, when the image does this move on to another part till all your image is clear, remove the grease proof paper and check your candle and image, the image should have no visible outer edges etc,
Too finish it off just decorate the sides with flowers etc or what ever you fancy, I also used a white fluid ink pen for the white dots in the centre of the flower, as seen above
The gorgeous butterflies are by Joy crafts and I added a smaller one on the side 6003/0033 and a larger on on top 6003/0023, I added a little frantage to them and finished off the top one by adding a pearl string tail from My Crafty Heart which I have just cut up into smaller pieces,
We are being sponsored again by the fabby Sir Stampalot
We are being sponsored again by the fabby Sir Stampalot
thank you,
Challenges
Magnolia down under - anything goes
crafts and me - anything goes
Happy Crafting!
Hugs Liz xx


.jpg)

6 comments:
So cute candle
with Tilda
hugs Tamara
THis is such a wonderful project Liz!!!!! Love how you added pearls to the top! Your flower arrangement on the side is awesome and what a great idea! Hugs, Brigitte
Hi Liz,
OMW, your candle is fabulous :) I never really knew what to do before, but your tutorial is wonderful hun. Tilda looks beautiful and I love the flowers too :) Hope your cold clears up soon, Big Hugs, Teresa xxx
I've always loved this technique, it's such a fun one and you have definitely made a sweet candle here with those soft tones Liz, just lovely! Hugs, Ira x
Ira’s Crea Corner
OH WOW WOW Liz!! GORGEOUSSSS!!! Thanks for the tutorial...I NEED to try this!!!!!! You ROCK!!!!
Oh wow Liz this is gorgeous and such wonderfully clear tutorial!
Hugs
Gina x
Post a Comment