


Hi guys, I recently showed you a Easter project onto which I had some handmade Foamiran style Daffodils, I said then I would show you how I made them, so here goes,
There are quite a few photo's so you may wish to grab a brew first!! you have been warned!! lol
I started out by cutting 4 layers of Foamiran through a Rosy Dot AC3 die that I got from Tracy at Noor Design UK, I used the largest pointed petal out of the two pointed petal dies in the set,


Separate the pieces out and colour with your chosen medium, I used some Gelatos and a wet wipe to blend the colour onto the petals on both sides

I wanted a paler look to my pointed petals but you can of course colour them deeper,
I then did the same steps using a small scalloped circle die about 1" in diameter, I think mine is by Tonic but any make will do,

I used a slightly darker Gelatos for these, again colouring on both sides,

Take one of your pointed petal dies and your medium hot iron, plus a wooden skewer or similar to hold the petal against the iron without burning your fingers, place one petal at a time with the skewer for a couple of seconds then release,

Do the same with each petal till all the petal tips are slightly bent forward,

Do the same for all the flowers you wish to make

Next take your circle dies and hold it against the iron again with the skewer, holding it close to the iron till it starts to lift slightly away,

As shown below, keep the skewer on the circle but let it ease away from the iron,

When it is quite risen and looks rounded release from the iron,

This is the look your after

Next you need an embosser tool and a deep foam mat or something similar,

Then turn the flower so the curled points are facing down, as shown below
 |
Press down in the center with your embosser |
 Let the flower close up quite close to the embossing tool, |

Next take the circle dies and do the same for these too,
 |


You are now ready to fix the two together, use a hot glue gun, add a drop of glue to
the underneath of the circle section,

Fix the top circle section onto one of the pointed petal flowers with the curled points of the petals facing down, when the glue has cooled


Next take a wooden skewer or similar and make a hole in the center for some stamens,
shown below

I added some stamens, after first dabbing some vintage photo distress ink on the ends, these are not truly like daffodill ones but they were in my stash so I made do, lol

I began by wrapping a piece of thin wire around the middle , bend the flowers in the middle, so the ends go together,


Then thread them through the hole in the middle of the flowers,


And cut of the rest of the stems when set,

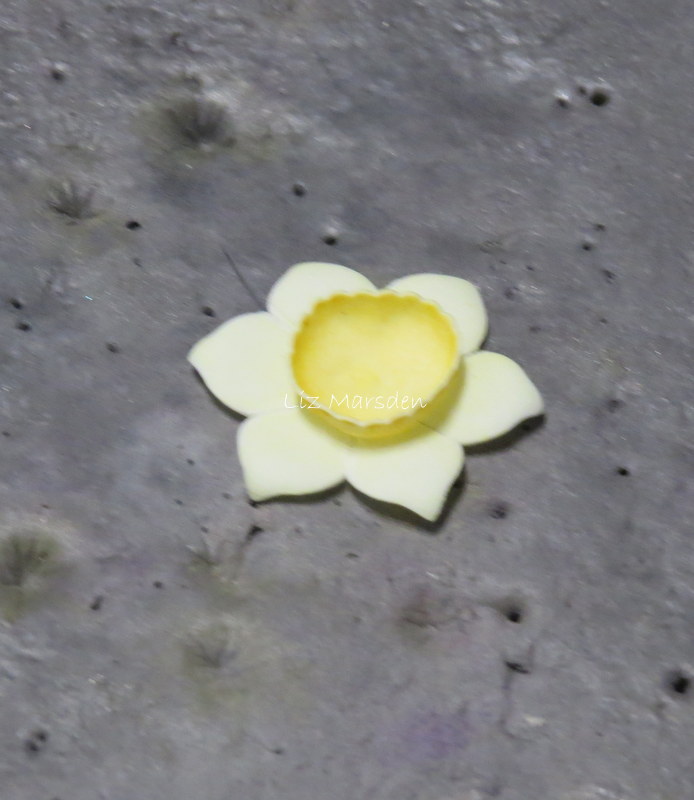
One of the finished flowers shown below,

Well i hope you are still here and you have managed to follow my tutorial ok, any questions just ask,
This is the finished creation I used them on,

Happy Crafting!!
Hugs Liz xx

7 comments:
Great tutorial and fabulous finished card will have to try this. I saw to cut 4 sheets together in a tutorial as it helped with the foam
Perfect little flowers and gorgeous card Liz. Thanks for the tutorial.
Wow amazing tutorial Liz, well done x
Awww so cute! Tell your hubby he did a great job!! hee hee
Such a fabulous tutorial, thank you for sharing Liz!!
Hugs
Gina xx
Wow Liz, these daffodils are fabulous, such a difficult flower for crafters to make. Well, not any more with your wonderful tutorial!!! Thank you so much for sharing it with us!!
Crafty Cuddles Jay xx
Oh just look at you being a big girl doing tutorials hahaha.
Hello my lovely :)
Fab tutorial and I love the gorgeous Tilda card xxx
Post a Comment