


Hi guys, I've made a Christmas Card this week!!!!!!! EEKK!!!
Those that know me know I don't really usually do Christmas till November and then usually under duress, lol so I am Ill? do I need my temperature read??
No really I just wanted to try Emilia's gorgeous flower die Leaves 002 as a Poinsettia styled flower, I have used this die a few different ways for a range of flowers, you can of course use it for a calyx behind other flowers too,
anyway here is how I used it this time and it looks fabulous but it's really easy to do,
I will give the tutorial for the flower below,

I started off with some paper in a blue colour then using a Tim Holtz stencil I used some paste through for a design on the base of my card, I let this air dry,

I've had this gorgeous snowflake in my stash for ages, to the side I glued some natural fibres and used these as my first layer then added a pair of skies over the bottom of the snowflake and too the side of the natural fibres,

Next I glued my made up Poinsettia flower on the side then added some silver berries I bought from The Range, along with some pine cones and some die cut leaves, I also found in my stash a couple of gem stones,
Then I added a little white Gesso here and there to finish the card off,
Easy Foamiran Poinsettia tutorial:

Die cut two of the largest and next sized down Leaves 002 dies for each finished Poinsettia flower, in your chosen Foamiran I used 0.6 White,


Take one of the flower heads and fold the petals together as best as you can, the scrunch the ends of the petals only backwards and forwards between your fingers till they look similar to above, do this for each flower die,


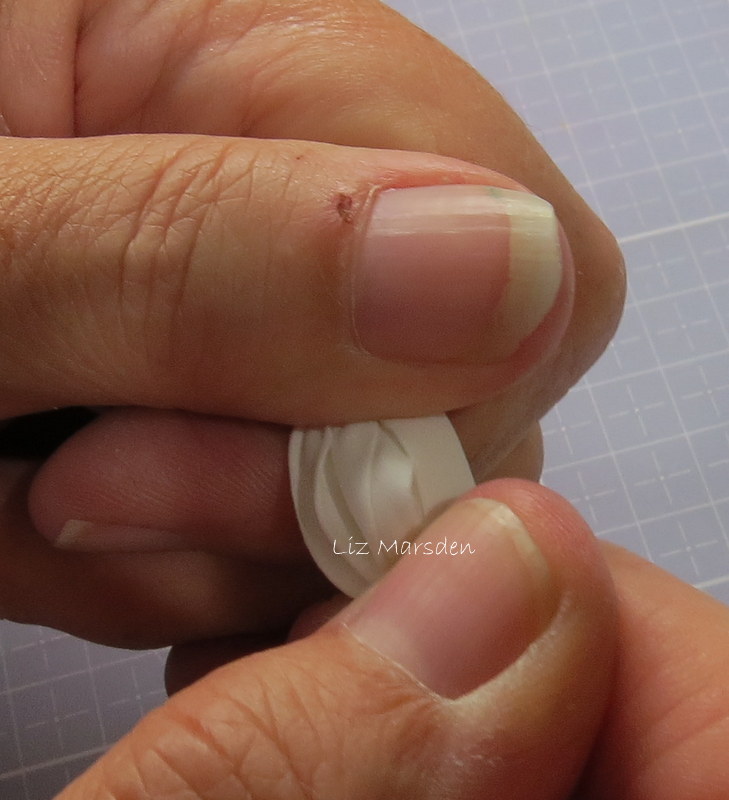

Carefully ease the flower heads open, slightly shaping the middle part of each petal by easing them outward between your thumbs, (do this slowly and carefully so as not to tear the Foamiran) trying to keep the ends scrunched as shown,


Layer the two largest flower heads together off setting the petals, then glue the smaller two the same way on top of the larger two,


Make a hole in the centre of the flower and thread some stamens of your choice through,


Glue the stamens in place behind the flower head to set, you can use hot glue or as I have this time Beacon 2- in 1 glue,

Remove the wire and leave to dry if using the glue I used,

When dry cut off the excess stamens and use your flower how you wish,

I kept mine very simple, you can of course colour the petals or use a coloured Foamiran, or add glitter if you wish, maybe that's for next time!!! Lol
Well I hope you can see how easy it is to make one of these flowers,
Lady E Leaves die 002
Foamiran 0.6 white
Lady E Leaves die 002
Foamiran 0.6 white
Happy Crafting!!

2 comments:
This is gorgeous,love the flower.xxx
This is beautiful Liz. The stenciling looks gorgeous and I love the snowflake and stunning poinsettia.
Have a lovely weekend.
Hugs
Gina xx
Post a Comment